
When a browser opens a regular React application, it receives HTML with an empty div and a JavaScript file.
|
1 2 3 4 5 6 7 8 9 |
<html> <head> <script defer src="/static/js/bundle.js"></script> </head> <body> <noscript>You need to enable JavaScript to run this app.</noscript> <div id="root"></div> </body> </html> |
When the browser receives the above response, it runs the JavaScript file that modifies the DOM tree and creates a web page. This is a good solution for many applications but has a few drawbacks.
Firstly, the above approach relies on the device the browser runs on to be able to render the React application. Depending on the complexity of our app, some users might encounter performance issues when using older devices.
Secondly, serving just an empty div in the initial response can hurt the ability of search engines to index our website correctly. Because of that, our SEO might suffer, and we might not be positioned high in Google search results.
Introducing Gatsby
Gatsby, at its core, is a static site generator. It takes our React code and Markdown files and generates HTML pages during the build process. We then need to deploy the build result to the web server. Then, when users request the page, we respond with the full HTML instead of an empty div.
You can find the code from this article in this repository.
Getting started
To start using Gatsby, we need just one command.
|
1 |
npm init gatsby |
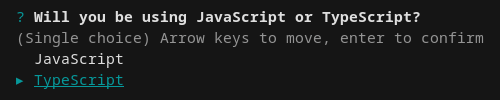
The command line interface asks us a bunch of questions. The most important question is about the language we want to use. Let’s use TypeScript.
Using the above command generates a bunch of files and directories:
|
1 2 3 4 5 6 7 8 9 10 11 |
├── gatsby-config.ts ├── package.json ├── package-lock.json ├── README.md ├── src │ ├── images │ │ └── icon.png │ └── pages │ ├── 404.tsx │ └── index.tsx └── tsconfig.json |
- gatsby-config.ts
- contains the metadata of our site along with plugins and other general configuration
- images
- the directory where we can put our images
- pages
- creating a file in this directory adds a new page to our website
- index.tsx
- the main page of our website
- 404.tsx
- the page that is displayed when the user accesses a page that does not exist
When we run npm start, our page is accessible at http://localhost:8000 by default.
Creating the index page
Let’s inspect a very basic page and break it down.
index.tsx
|
1 2 3 4 5 6 7 8 9 10 11 12 13 14 15 16 |
import React, { FunctionComponent } from 'react'; import type { HeadFC, PageProps } from 'gatsby'; const IndexPage: FunctionComponent<PageProps> = () => { return ( <main> <h1>Hello world!</h1> </main> ); }; export default IndexPage; export const Head: HeadFC = () => { return <title>Home Page</title>; }; |
The component that describes our page can have any name, but Gatsby expects us to use the default export. The page component accepts various props that describe the page, such as the path. We can also create a Head component and export it. Gatsby will add it to our document’s <head></head> section.
Running npm run build creates the public directory containing the build’s result. Let’s inspect the index.html file that is created during the above process.
index.html
|
1 2 3 4 5 6 7 8 9 10 11 12 13 14 15 16 17 18 19 20 21 22 23 24 25 26 27 28 29 30 31 32 33 34 35 |
<!DOCTYPE html> <html> <head> <meta charSet="utf-8"/> <meta http-equiv="x-ua-compatible" content="ie=edge"/> <meta name="viewport" content="width=device-width, initial-scale=1, shrink-to-fit=no"/> <meta name="generator" content="Gatsby 5.0.0"/> <title data-gatsby-head="true">Home Page</title></head> <body> <div id="___gatsby"> <div style="outline:none" tabindex="-1" id="gatsby-focus-wrapper"> <main><h1>Hello world!</h1></main> </div> <div id="gatsby-announcer" style="position:absolute;top:0;width:1px;height:1px;padding:0;overflow:hidden;clip:rect(0, 0, 0, 0);white-space:nowrap;border:0" aria-live="assertive" aria-atomic="true"> </div> </div> <script id="gatsby-script-loader"> /*<![CDATA[*/ window.pagePath = "/"; /*]]>*/ </script> <!-- slice-start id="_gatsby-scripts-1" --> <script id="gatsby-chunk-mapping"> window.___chunkMapping = "{\"app\":[\"/app-c5a882e78f20f6785ac9.js\"],\"component---src-pages-404-tsx\":[\"/component---src-pages-404-tsx-7ceacb42b41becb8f7ec.js\"],\"component---src-pages-index-tsx\":[\"/component---src-pages-index-tsx-c0e264b5cc3f7b3a4b3f.js\"]}"; </script> <script>window.___webpackCompilationHash = "45d3707acc6aff004f70";</script> <script src="/webpack-runtime-0f295ecba0be458ff805.js" async></script> <script src="/framework-aae9b53f260dd155db14.js" async></script> <script src="/app-c5a882e78f20f6785ac9.js" async></script> <!-- slice-end id="_gatsby-scripts-1" --> </body> </html> |
The most important thing is that Gatsby rendered the IndexPage and Head components. Gatsby also adds various JavaScript files related to React and Webpack. It also injects elements such as gatsby-focus-wrapper and gatsby-announcer that aim to improve accessibility.
Adding a page
Adding a new page is very straightforward. To do that, we need to create a new file in the pages directory and make sure we use a default export.
about.tsx
|
1 2 3 4 5 6 7 8 9 10 11 12 13 14 15 16 |
import React, { FunctionComponent } from 'react'; import type { HeadFC, PageProps } from 'gatsby'; const AboutPage: FunctionComponent<PageProps> = () => { return ( <main> <h1>About me page</h1> </main> ); }; export default AboutPage; export const Head: HeadFC = () => { return <title>About me</title>; }; |
When we add a new file to the pages directory, Gatsby checks the file’s name and creates a new page accordingly. Because we’ve called the file about.tsx, we can now access http://localhost:8000/about/.
We could nest our file in a subdirectory, for example, /pages/information/about.tsx. This would create a http://localhost:8000/information/about/ page.
We can also create index.tsx files in subdirectories, for example, /pages/about/index.tsx. This would create a page under the http://localhost:8000/about/ address.
Linking to another page
We can also create a way to navigate from one page to another by using the <Link> component.
about.tsx
|
1 2 3 4 5 6 7 8 9 10 11 12 13 14 15 16 17 18 |
import React, { FunctionComponent } from 'react'; import type { HeadFC, PageProps } from 'gatsby'; import { Link } from 'gatsby'; const AboutPage: FunctionComponent<PageProps> = () => { return ( <main> <h1>About me page</h1> <Link to="/">Go to the main page</Link> </main> ); }; export default AboutPage; export const Head: HeadFC = () => { return <title>About me</title>; }; |
Gatsby uses the Intersection Observer API to wait for the <Link> component to be visible to the application’s user. As soon as that’s the case, Gatbsy preloads the new page so that the user does not notice the additional loading time.
Using SCSS with CSS modules
Combining SCSS and CSS modules is a good solution for styling React applications. SCSS contains a bunch of advanced features and serves as an extension to the CSS language. By using CSS modules, we can scope our styles per component and avoid many headaches.
To start using SCSS with Gatsby, we need to install a few packages first.
|
1 |
npm install sass gatsby-plugin-sass |
We also need to add gatsby-plugin-sass to our configuration.
gatsby-config.ts
|
1 2 3 4 5 6 7 |
import type { GatsbyConfig } from 'gatsby'; const config: GatsbyConfig = { plugins: ['gatsby-plugin-sass'], }; export default config; |
Let’s create a straightforward SCSS file to test if it works as expected.
index.module.scss
|
1 2 3 |
.header { color: orange; } |
We also need to create a TypeScript declaration to import the above file. Without that, we would receive the following error:
Cannot find module ‘./index.module.scss’ or its corresponding type declarations.
scss.d.ts
|
1 |
declare module '*.scss'; |
We can now start using SCSS modules in our application.
index.tsx
|
1 2 3 4 5 6 7 8 9 10 11 12 13 14 15 16 17 |
import React, { FunctionComponent } from 'react'; import type { HeadFC, PageProps } from 'gatsby'; import * as styles from './index.module.scss'; const IndexPage: FunctionComponent<PageProps> = () => { return ( <main> <h1 className={styles.header}>Hello world!</h1> </main> ); }; export default IndexPage; export const Head: HeadFC = () => { return <title>Home Page</title>; }; |
Deploying Gatsby to GitHub Pages
GitHub Pages is a way to host our static pages directly from our GitHub repository for free. Thanks to that, our page can be publicly available either on the github.io domain or our own.
We can also deploy Gatsby to GitLab Pages.
When we use the github.io domain, our website is accessible at https://[user].github.io/[repository]. For example, you can view the page created when writing this article at https://mwanago.github.io/gatsby/. Since we host our application at something other than the domain’s root, we need to specify an appropriate prefix for all of the paths on the website for links to work correctly.
gatsby-config.ts
|
1 2 3 4 5 6 7 8 |
import type { GatsbyConfig } from 'gatsby'; const config: GatsbyConfig = { pathPrefix: '/gatsby', plugins: ['gatsby-plugin-sass'], }; export default config; |
Above, use the name of your repository instead of gatsby.
We want GitHub to automatically deploy our website whenever we push changes to the master branch. To achieve that, we need to define a GitHub workflow. A workflow is an automated process that can run a set of steps to build and deploy our application.
The most straightforward way to configure our repository to deploy Gatsby to GitHub Pages is to use GitHub Actions. To do that, we need to go to the settings page in our repository and click on the pages tab.
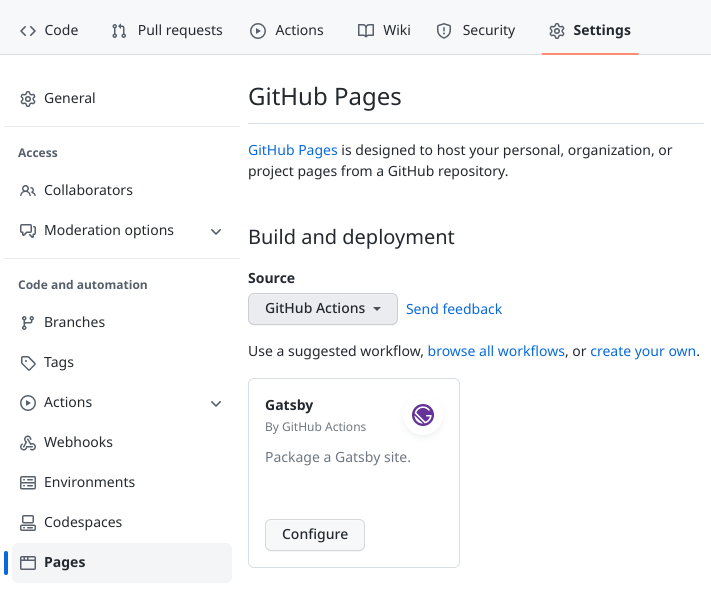
When we choose GitHub Actions as the source for our GitHub Pages, we are presented with the option to use a default workflow for building and deploying Gatsby applications.
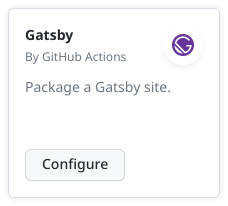
When we click the “configure” button, we can create a commit with the gatsby.yml file that contains our workflow.
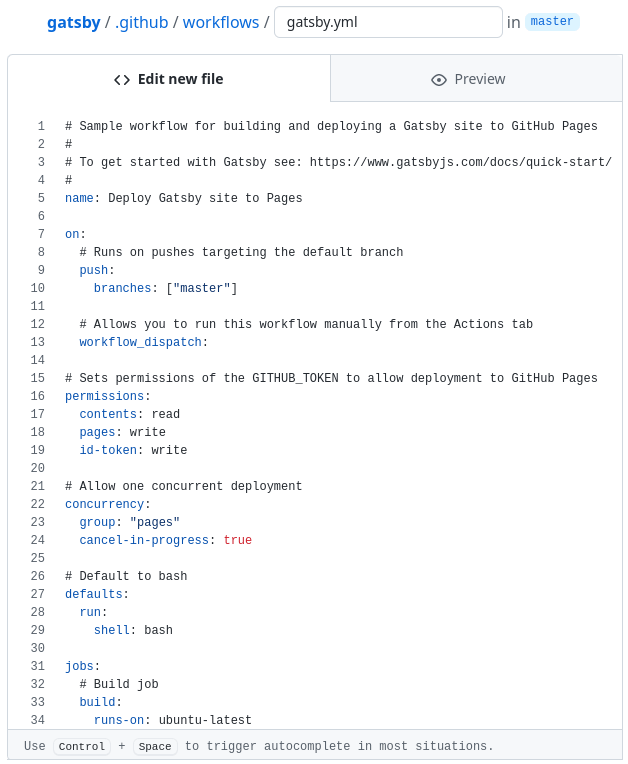
Pushing the gatsby.yml file to our master branch causes our workflow to run. It builds and deploys our application to GitHub pages.
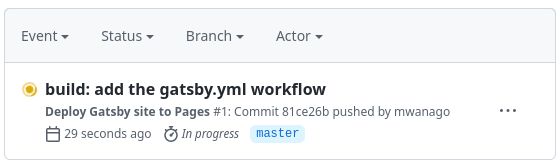
Let’s take a look at an important part of our gatsby.yml file:
|
1 2 3 4 |
on: # Runs on pushes targeting the default branch push: branches: ["master"] |
In the above configuration, we specify that when we push changes to the master branch, we want to trigger a new build and deployment automatically.
Summary
In this article, we’ve learned how to set up a basic project with Gatsby, TypeScript, and SCSS. To appreciate the results, we’ve set up a CI/CD pipeline using GitHub Actions. It deploys our application to GitHub Pages every time we push changes to the master branch. All of the above is enough to understand the basics of how Gatsby works. It also allows us to start creating applications right away.
