
- 1. Getting geeky with Git #1. Remotes and upstream branches
- 2. Getting geeky with Git #2. Building blocks of a commit
- 3. Getting geeky with Git #3. The branch is a reference
- 4. Getting geeky with Git #4. Fast-forward merge and merge strategies
- 5. Getting geeky with Git #5. Improving merge workflow with rebase
- 6. Getting geeky with Git #6. Interactive Rebase
- 7. Getting geeky with Git #7. Cherry Pick with Reflog
- 8. Getting geeky with Git #8. Improving our debugging flow with Bisect and Worktree
- 9. Getting geeky with Git #9. Understanding the revert feature
- 10. Getting geeky with Git #10. The overview of Git hooks with Husky
- 11. Getting geeky with Git #11. Keeping our Git history clean with fixup commits
By automating processes, we can ensure that they are performed at the right time and Git hooks can help us with it. Also, with JavaScript, we have a commonly used library called Husky. This article delves into how Git hooks work and how Husky helps us deal with them.
The idea behind Git hooks
With Git hooks, we have a possibility of running custom scripts when certain events happen. This feature has quite a few use cases. For example, with Git hooks, we can implement Continuous Integration (CI) or enforce a particular code style.
When we initialize an empty Git repository with the git init command, we create a .git directory. The place for our hooks is in .git/hooks.
A new Git repository already contains a set of example hooks. Let’s check them out.
|
1 |
ls -1 .git/hooks |
With -1 we can print one file per line.
|
1 2 3 4 5 6 7 8 9 10 11 12 |
applypatch-msg.sample commit-msg.sample fsmonitor-watchman.sample post-update.sample pre-applypatch.sample pre-commit.sample pre-merge-commit.sample prepare-commit-msg.sample pre-push.sample pre-rebase.sample pre-receive.sample update.sample |
The above list gives us an overview of the hooks that we can use. Each of the above files contains some example logic. To put it to use, we need to remove the .sample file extension.
When we call a Bash script, we can do that with arguments. Consider the following:
|
1 |
sh ./my-script.sh Hello |
my-script.sh
|
1 |
echo $1 |
With $1, we can access the first argument, and with $2, we get the second one, and so on.
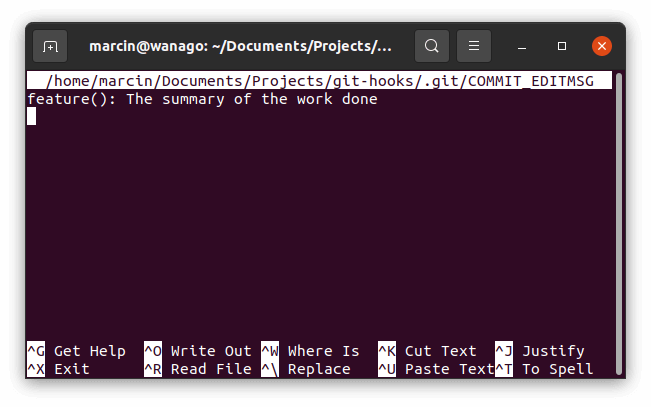
Git hooks also receive a set of arguments. A good example is a prepare-commit-msg hook. It runs before the commit message editor opens when we run git commit. We can use it to set our own initial value for the commit message.
|
1 2 3 4 5 |
#!/bin/sh COMMIT_MESSAGE_FILE=$1 echo "feat: The summary of the work" > $COMMIT_MESSAGE_FILE |
Above, I’m using the Conventional Commits message convention
All sample hooks created with git init are executable by default. If we create new files instead of modifying the samples, w need to make sure that they are executable.
In Unix-like operating systems, we can use chmod to make files executable.
|
1 |
chmod +x .git/hooks/prepare-commit-msg |
Creating Git Hooks with JavaScript
Every sample hook from .git/hooks begins with a line indicating which interpreter to use to run the file. For me, on Ubuntu, it looks like that:
|
1 |
#!/bin/sh |
The above is called a shebang line. It indicates which interpreter needs to be used to run the code. Even though the example hooks use Bash, we can use Python or JavaScript.
With Node.js, we can access the arguments through the process.argv property. Let’s rewrite the prepare-commit-msg hook with Node.js.
|
1 2 3 4 5 6 7 8 9 10 11 |
#!/usr/bin/env node const fs = require('fs'); const initialCommitMessage = 'feat: The summary of the work'; fs.writeFile(process.argv[2], initialCommitMessage, (error) => { if (error) { console.log('An error occured'); } }); |
To access the first argument provided to the script, we need to access process.argv[2]. If you want to know more, check out Node.js TypeScript #1. Modules, process arguments, basics of the File System
Client-side hooks
In general, we can divide Git hooks into two categories. We refer to the first group as client-side hooks.
The client-side hooks affect only the local repository. A good example is the prepare-commit-msg hook that we’ve already used in this article.
Since every team member can modify their local hooks, it isn’t straightforward to use them to ensure the code style. This is where the Husky library can help.
|
1 |
npm install husky |
With Husky, we have an easy way of enforcing local hooks for all of our teammates. A common use case is running eslint before every commit. To do that, we need the pre-commit hook.
package.json
|
1 2 3 4 5 6 7 8 9 10 11 |
{ "scripts": { "lint": "eslint ./src/**/*.ts{,x}" }, "husky": { "hooks": { "pre-commit": "npm run lint" } } ... } |
Thanks to doing the above, every time somebody tries to create a commit, Git runs Eslint. If there are any errors during that process, the commit isn’t created.
Our team member creating a commit can use the --no-verify flag to avoid running the pre-commit hook, but it still adds a layer of automatic code review.
Aside from the pre-commit and prepare-commit-msg, there are various other client-side hooks worth noting:
- post-commit – runs when the commit process completes,
- post-checkout – executes after running git checkout,
- post-merge – runs after a successful merge,
- pre-rebase – executes before rebasing.
For a full list of all client hooks, check out the official documentation.
Server-side hooks
Server-side hooks work a bit differently than client-side hooks. We need to put them in our server-side repository, and they run before and after pushes.
Pre-receive
The pre-receive hook runs every time someone pushes commits to the repository. We can return a non-zero code from our script if we don’t like anything about the contents of the commit. The pre-receive hook receives a list of references pushed to the server.
Update
The update hook runs after pre-receive and is quite similar. This hook doesn’t get a complete list of references pushed to the server. Instead, the hook is called separately for each branch pushed by the user. It receives three arguments:
- the name of the branch,
- the hash of the commit before the push,
- the hash of the commit the user is pushing.
The update hook has an advantage over pre-receive. If the user is pushing to multiple branches, we can approve some of those while rejecting the others.
Post-receive
The post-receive hook runs after the entire process of pushing is finished. It is a fitting place to send notifications. For example, we can have a bot that messages us every time someone pushes changes to the master branch. The post-receive hook also gets a complete list of references pushed to the server.
Running server-side hooks
Since server-side hooks include arbitrary code, it isn’t straightforward to run them with providers such as GitHub and GitLab. They are available in solutions such as GitHub Enterprise or self-hosted GitLab.
Even though that’s the case, certain features of providers such as GitHub might use server-side hooks under the hood. A good example are Push Rules from GitLab. The server-side hooks are a broad topic and are worth exploring deeper in a separate article.
Summary
In this article, we’ve gone through Git hooks and their use-cases. We’ve learned how to write our own Git hooks both in Bash and in JavaScript. We used the Husky library to enforce all of our team members to adhere to coding guidelines. We’ve also touched on the subject of server-side hooks.
