The serverless approach to building applications is getting more and more popular. It might be appealing to write and deploy code without worrying about the infrastructure underneath.
Serverless computing still involves servers. The provider takes care of their maintenance entirely, though. We write event-driven functions that contain business logic. The provider charges us solely based on the compute time instead of a monthly fee.
The most mature Function as a service (FaaS) platform seems to be AWS Lambda. In this article, we explore its basics and some of the uses cases.
The basics of AWS Lambda
To create our first function, let’s go to the AWS Lambda dashboard and click on “Create function”. Let’s keep it simple for now.

The first thing that we notice after creating our first function is the code editor.
We end up with a fundamental “Hello world” code. Let’s modify it a little bit:
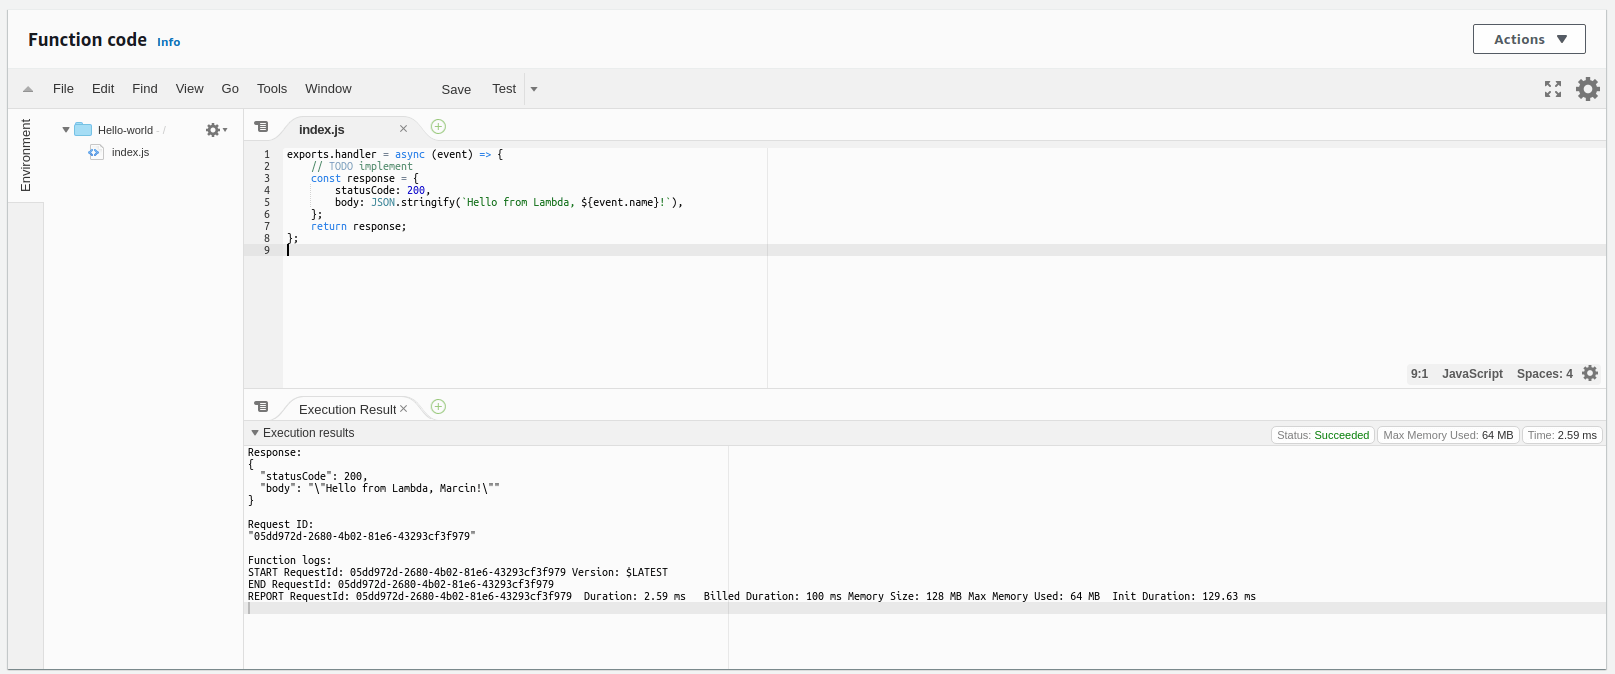
Above, you can see that we use the event.name property. This is thanks to the fact that we can send JSON data along with our events.
Let’s create a test event and try out our function.
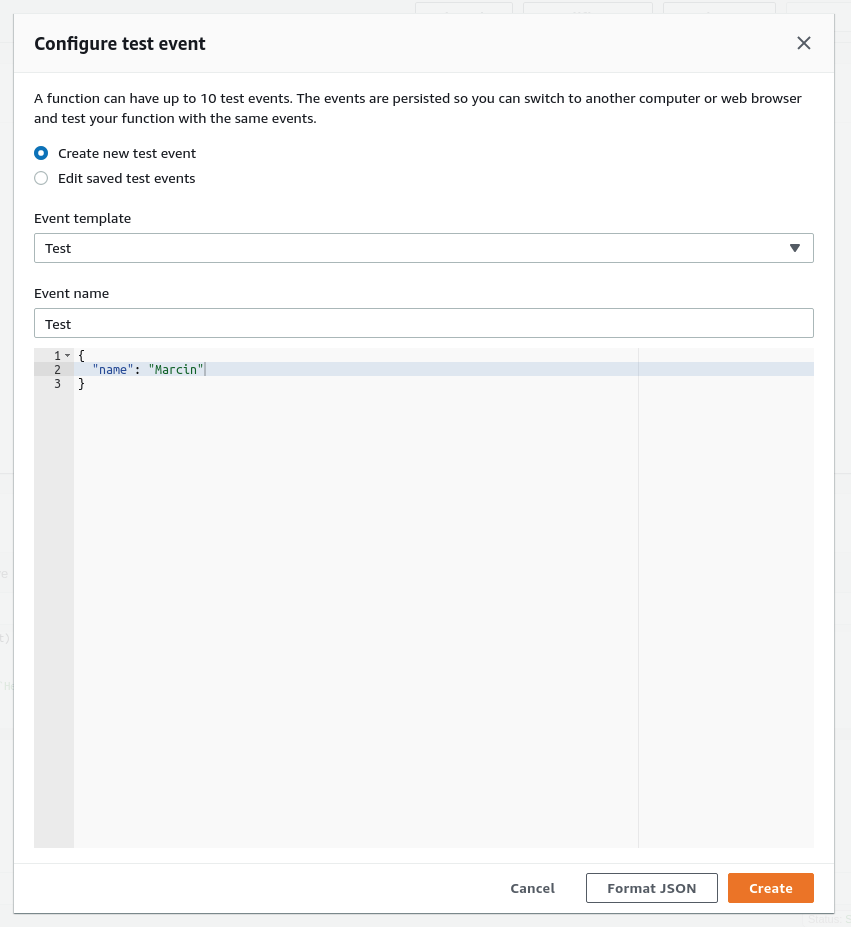
Now we can choose our event and click the “Test” button to use it.
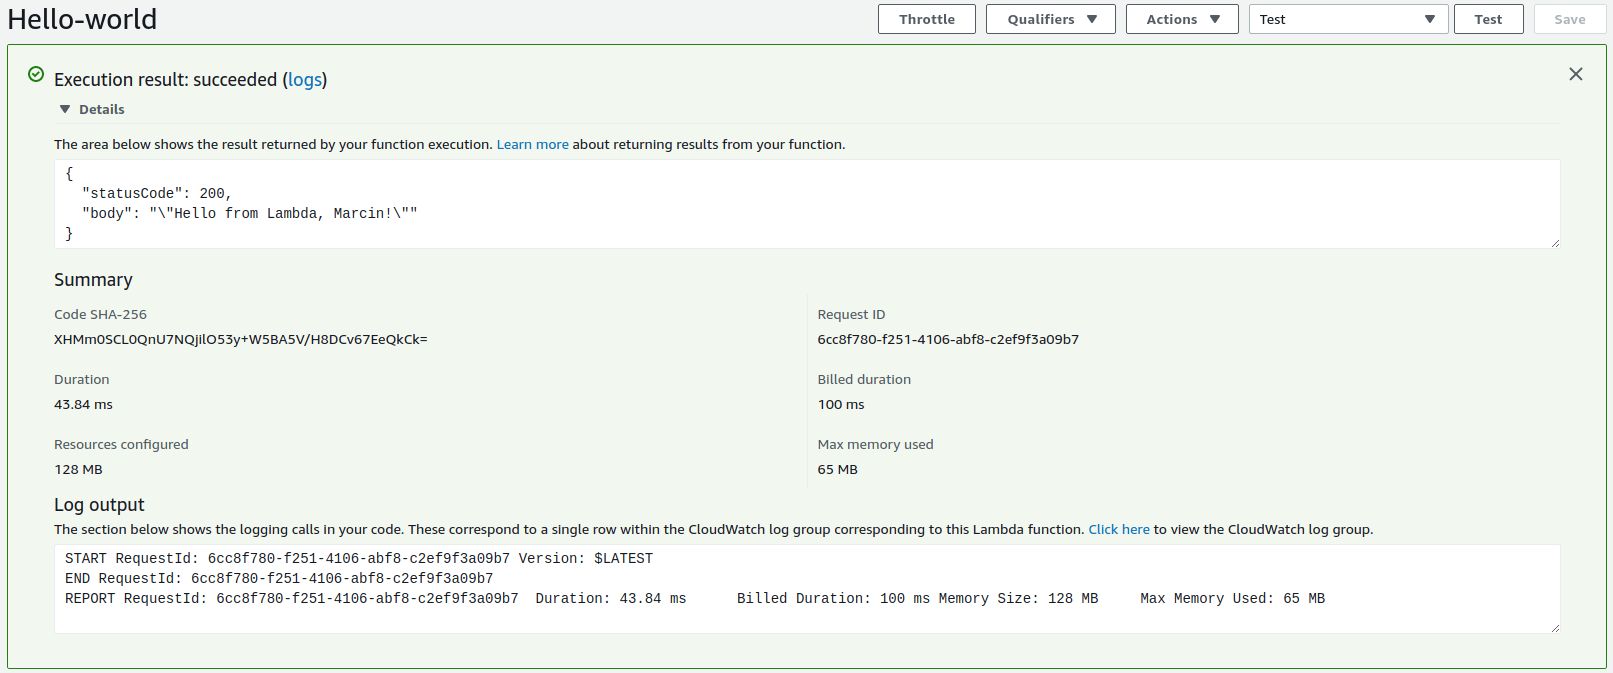
There are a few things to note above. Even though our function ran for about 40ms, we have been billed for 100ms. This is because AWS charges us in 100ms blocks. Therefore, there is no benefit cost-wise in optimizing our function if the execution time is below 100ms already.
Also, please note that above you can also click to view the logs on CloudWatch.
Managing a contact form with AWS Lambda
The best way to learn something is to try to cover a real-world use-case. Let’s create an endpoint that will allow us to handle a contact form on our website.
Configure Simple Email Service (SES)
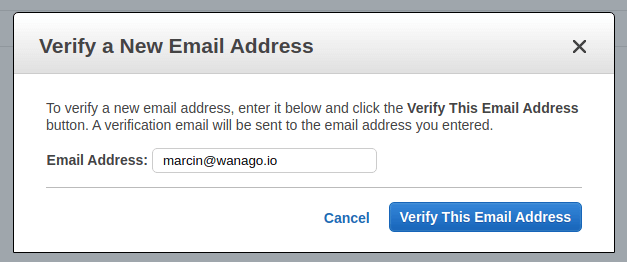
The very first thing to do is to set up Amazon Simple Emal Service (SES) properly. Amazon places all new accounts in the Amazon SES sandbox. Due to that, both the email sender and the receiver needs to be verified. To do that, we need to visit the Amazon SES dashboard.
Create an IAM role
With Identity and Access Management (IAM) roles, we can determine a set of permissions. Since we want our Lambda to be able to send emails, we need to create a role that allows it. To do that, let’s go to the IAM Management Console.
When creating a role, choose Lambda as a use case.
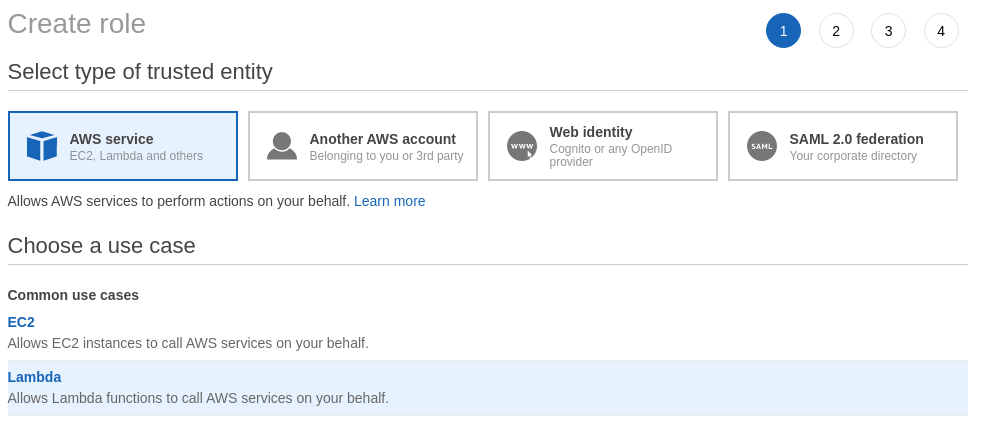
In the next screen, create a policy and use the following JSON:
|
1 2 3 4 5 6 7 8 9 10 11 |
{ "Version": "2012-10-17", "Statement": [ { "Sid": "VisualEditor0", "Effect": "Allow", "Action": "ses:SendEmail", "Resource": "*" } ] } |
Now we can give our policy a name.
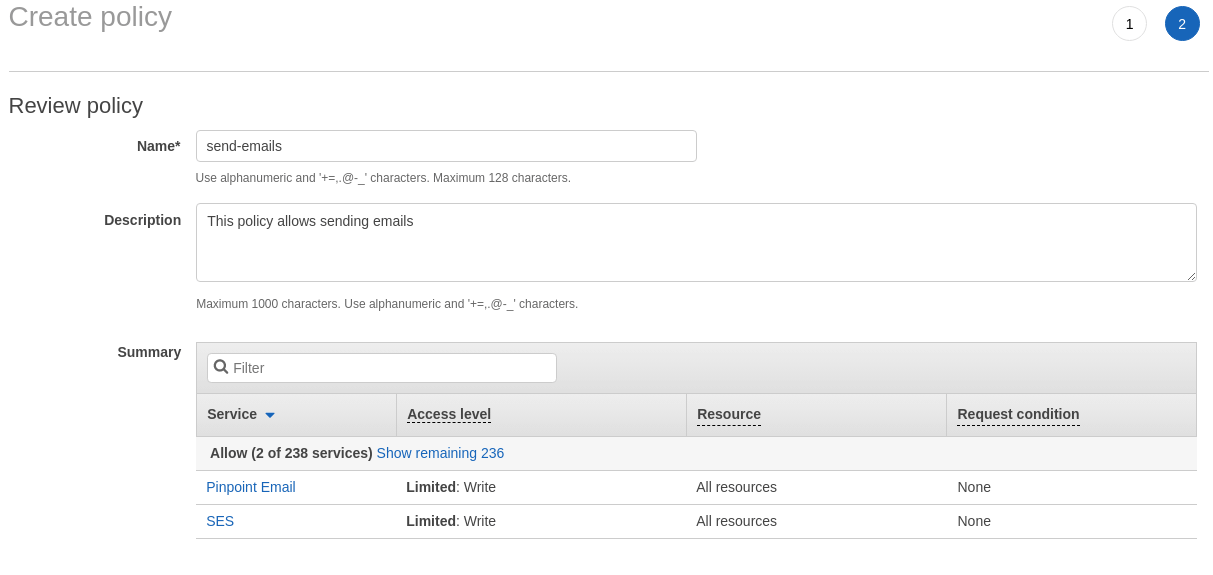
Now, our newly created policy should be available in the list. If that’s not the case, click on the refresh button in the top right corner.

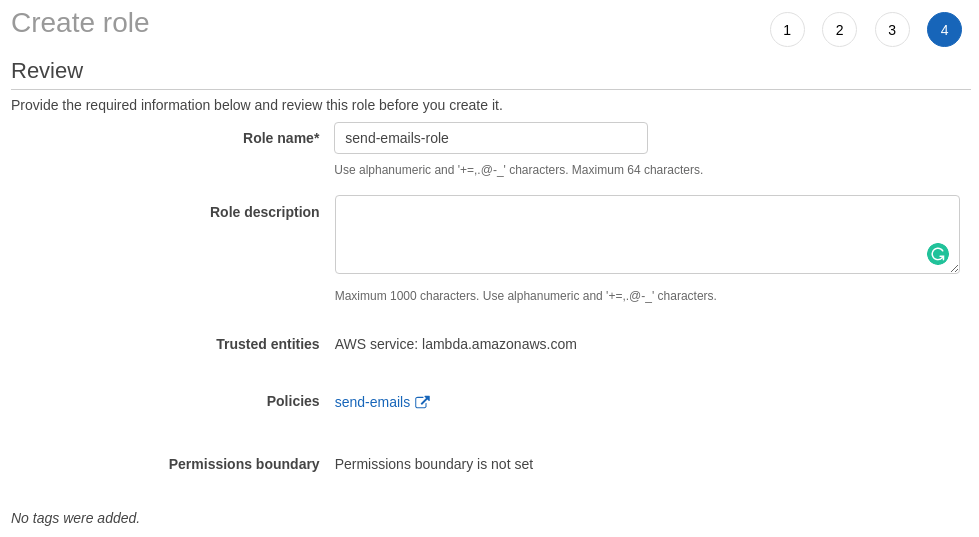
The last thing to do is to name our role.
Creating a Lambda function to send emails
Once we have all of the above set up, we can write a Lambda function that sends emails. To do that, create a function in the same way as the one at the beginning of the article. This time we choose our new role, though.
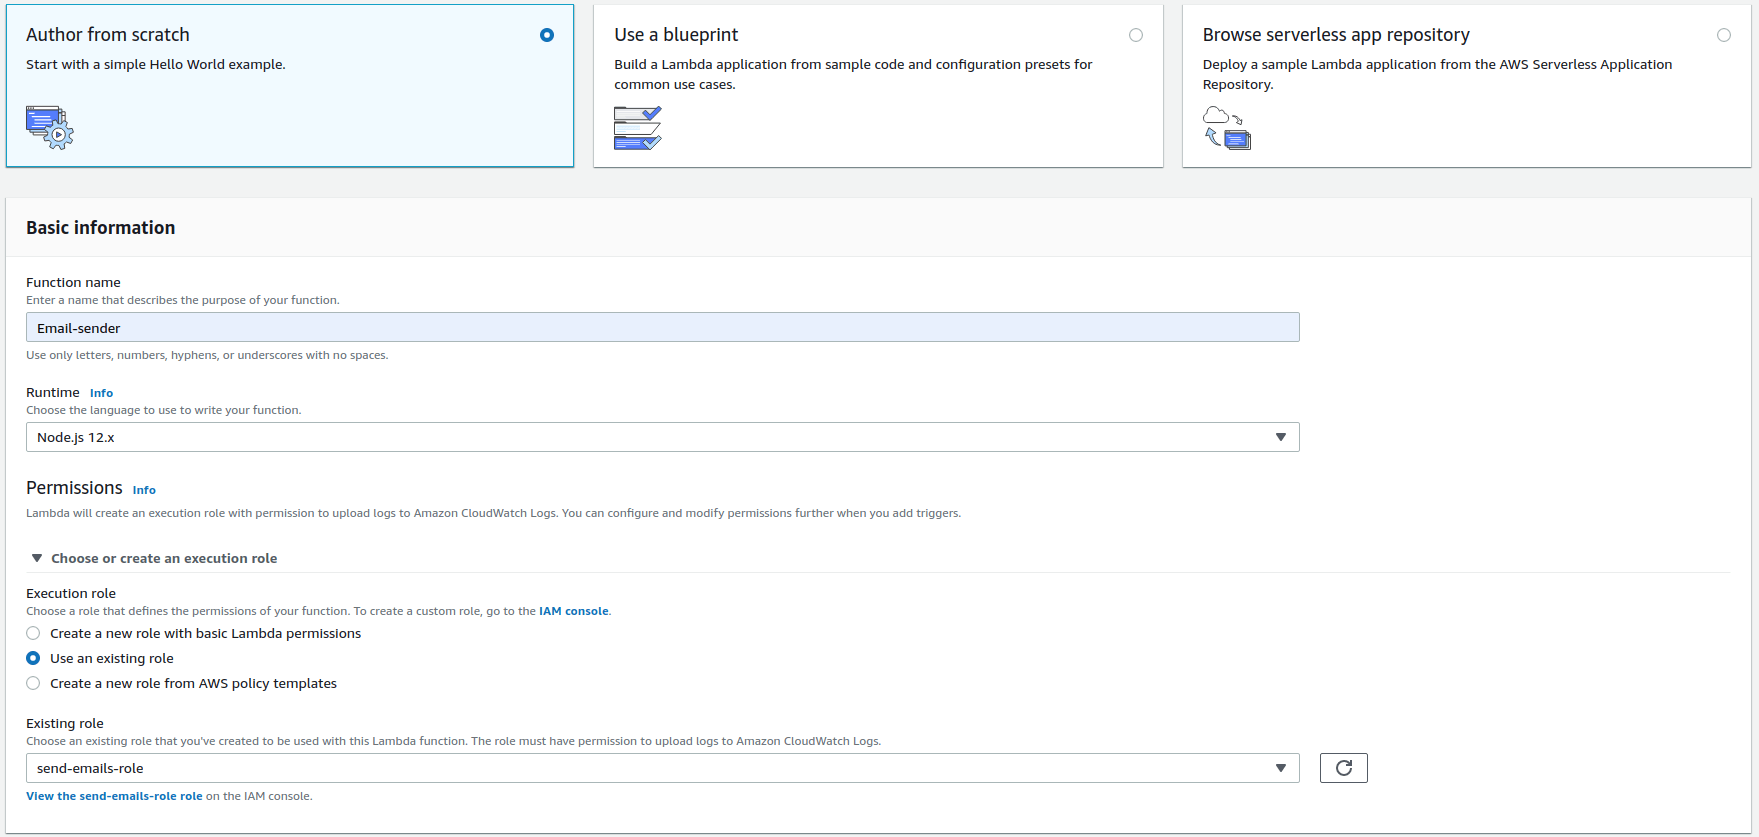
The first thing to do is to add our verified email to the environment variables.
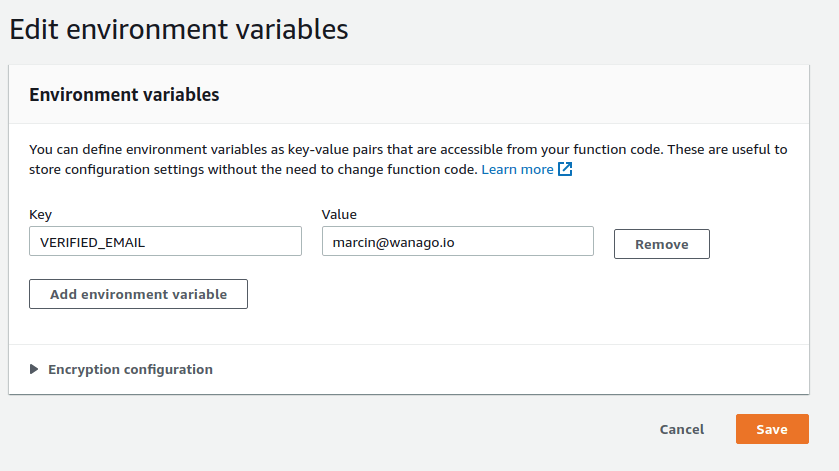
Now, let’s configure a test event that will trigger our new Lambda function.
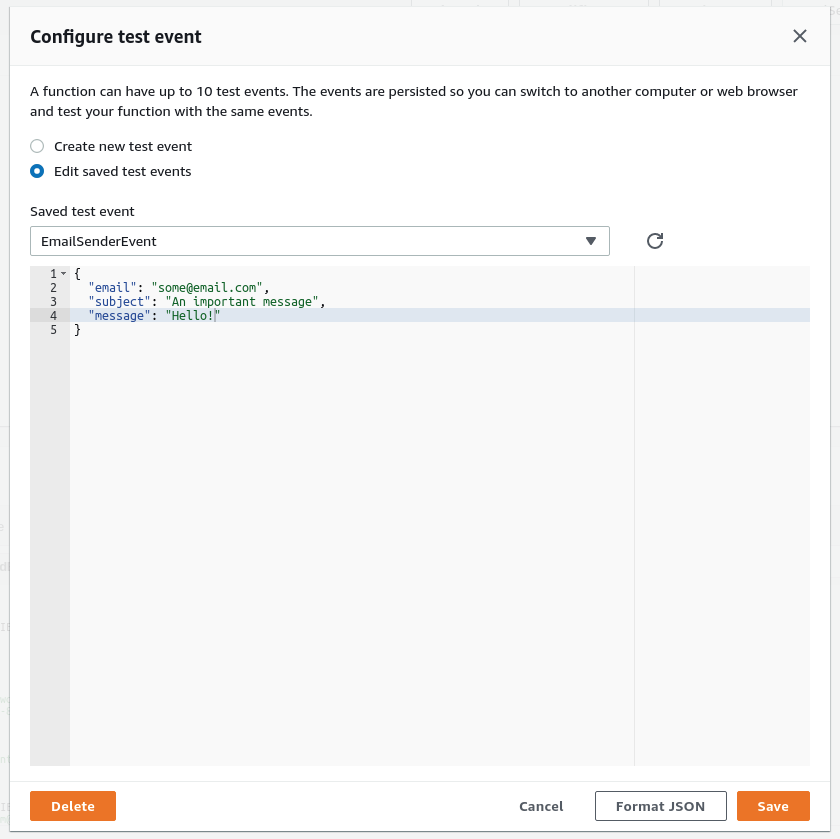
As you can see above, our form contains three fields: the email of the sender, the subject, and the message. Now we can create a function that uses all of the above data to send an email.
sendEmail.js
|
1 2 3 4 5 6 7 8 9 10 11 12 13 14 15 16 17 18 19 20 21 22 23 24 25 26 27 28 29 |
const AWS = require('aws-sdk'); const ses = new AWS.SES(); function sendEmail(subject, message, senderEmail) { const params = { Destination: { ToAddresses: [ process.env.VERIFIED_EMAIL ] }, Message: { Body: { Text: { Data: message, Charset: 'UTF-8' } }, Subject: { Data: subject, Charset: 'UTF-8' } }, Source: process.env.VERIFIED_EMAIL, ReplyToAddresses: [senderEmail] } return ses.sendEmail(params).promise(); } module.exports = sendEmail; |
Please note that we send the email provided in the contact form in the ReplyToAddresses array.
Now we can use the above code to send emails in our Lambda function.

Configuring Amazon API Gateway
So far, the only way to run our Lamba function is to invoke a test event. Since we want our users to be able to send emails, we need to create an API that allows that.
To do so, we need to use Amazon API Gateway. With it, we can build an API not only four our Lamba function, but also for services such as Elastic Compute Cloud or Elastic Beanstalk. API Gateway can handle the task of accepting and processing API calls for us.
To do the above, we need to go to the API Gateway dashboard and create a REST API.
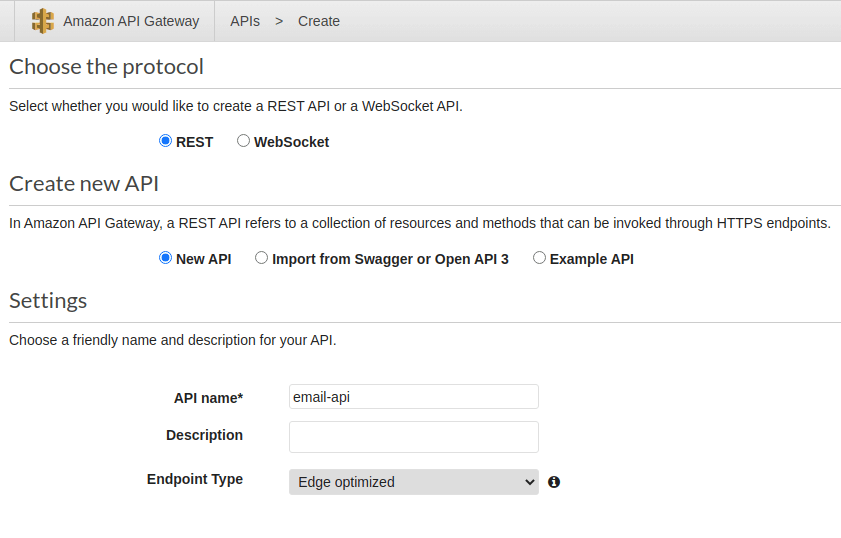
Above, we can choose between different endpoint types. If you want to read up on the difference between Edge optimized and Regional, check out this thread on Stackoverflow
Now we need to create a resource for our API. To do that, we need to navigate through the Actions dropdown.
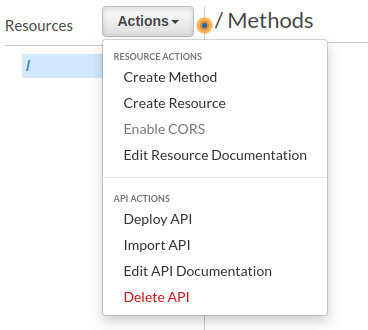
Since we want API Gateway to set up the CORS configuration for us, we tick the Enable API Gateway CORS checkbox.

If you want to know more abour CORS overall, check out Cross-Origin Resource Sharing. Avoiding Access-Control-Allow-Origin CORS error
Now we can navigate the Actions dropdown again and create a POST method for our resource.
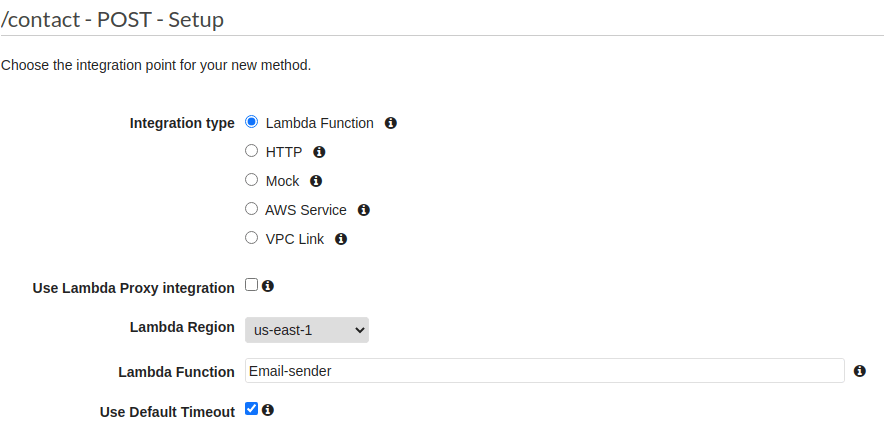
To select something in the Lambda Function input above we actually need to start typing. No options are presented until we type something, so keep that in mind
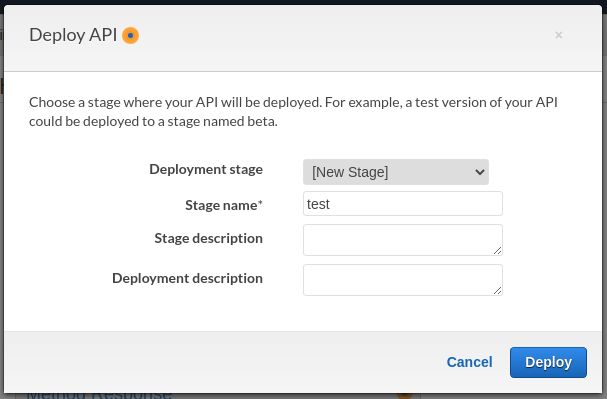
The last step is to deploy the API using the Actions dropdown. During that, we AWS might ask us about specifying a stage. We can have multiple stages, for example, a production and a test environment.
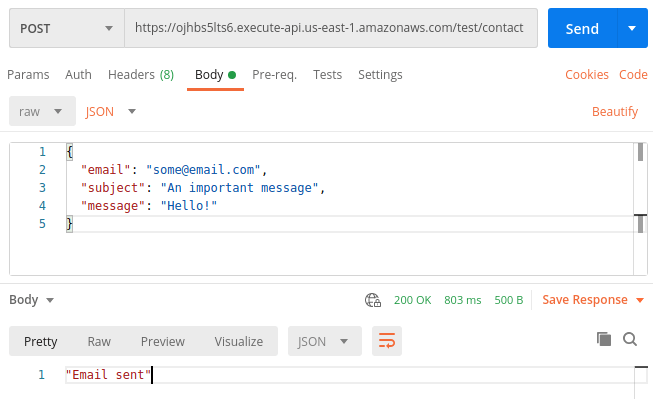
Thanks to all of the above, we can now send emails using a REST API. We can test that using Postman.
Summary
Now we are free to integrate the above endpoint into the frontend of our application in any way we see fit. By creating the above contact flow, we’ve learned quite a lot. We’ve covered a real use-case for AWS Lambda and learned how to create it. To do so, we also had to utilize the Simple Emal Service and API Gateway. Feel free to experiment with all of the above and come up with more Lambda functions.

I have been trying to get my static website’s contact form work through AWS Lambda, SES and AWS API Gateway. I was able to figure out the rest, but I wasn’t able to understand how to pass params through Lambda (using Node.js). I have been researching for days, and read through tens and tens of articles and tutorials, and failed every time. I cannot thank you enough for writing this article, because thanks to this tutorial I was able to make my serverless contact form work!!!