
- 1. Getting geeky with Git #1. Remotes and upstream branches
- 2. Getting geeky with Git #2. Building blocks of a commit
- 3. Getting geeky with Git #3. The branch is a reference
- 4. Getting geeky with Git #4. Fast-forward merge and merge strategies
- 5. Getting geeky with Git #5. Improving merge workflow with rebase
- 6. Getting geeky with Git #6. Interactive Rebase
- 7. Getting geeky with Git #7. Cherry Pick with Reflog
- 8. Getting geeky with Git #8. Improving our debugging flow with Bisect and Worktree
- 9. Getting geeky with Git #9. Understanding the revert feature
- 10. Getting geeky with Git #10. The overview of Git hooks with Husky
- 11. Getting geeky with Git #11. Keeping our Git history clean with fixup commits
In the previous part of this series, we’ve looked into how rebase can improve our merges. It is a lot more powerful, though, and can come in handy in other situations. In this article, we explore how to perform interactive rebasing.
Introduction to the interactive rebase tool
When doing an interactive rebase, we can modify existing commits. This includes those that we’ve already pushed to our remote repository.
The above can prove to be useful in various scenarios. One of the most simple ones is fixing a typo in a commit message. Another might be adding a file that we forgot about. We might have also made a mistake in our code that we would like to fix without creating a new commit.
No matter what the cause is, we need to remember the golden rule of rebasing. Since it involves overwriting history, we should avoid doing that to branches used by other developers. Not following this principle will cause various issues to your teammates.
To start an interactive rebase, we need to use the -i flag. The second thing to indicate is how far we want to go back when rebasing.
In the third part of this series, we’ve learned that usually, HEAD points to the same commit that the branch that we currently use. We can use this piece of information when performing an interactive rebase.
|
1 |
git rebase -i HEAD~4 |
The above means that we will be able to modify four last commits.
You can also use git rebase --root to rebase all of your commits
Modifying existing commits
Let’s try the above on the repository for the NestJS series. When we do that, a text editor opens up.
|
1 2 3 4 |
pick d5e397d feat(Files): configure AWS SDK pick 535fa30 feat(Files): upload files to Amazon S3 pick b54aa70 feat(Users): link uploaded Files to the user pick a1d4bc6 feat(Users): add the possibility to delete avatars |
An important thing to notice is that the above commits are in the reverse order. This is because when we run the above command, Git removes those commits and applies the included changes once again from the oldest to the newest. The useful thing is that we can change the commits in this process.
If we lave the pick word at the beginning of the line, the commit will not change in the process of rebasing. We have a few options here, some of them being:
|
1 2 3 4 |
p, pick <commit> = use commit r, reword <commit> = use commit, but edit the commit message e, edit <commit> = use commit, but stop for amending s, squash <commit> = use commit, but meld into previous commitf |
Aside from choosing one of the possibile keywords, we can also remove commits or change their order
The most straightforward of the above is the reword. If we replace one of the pick keywords with it, we can edit the commit message.
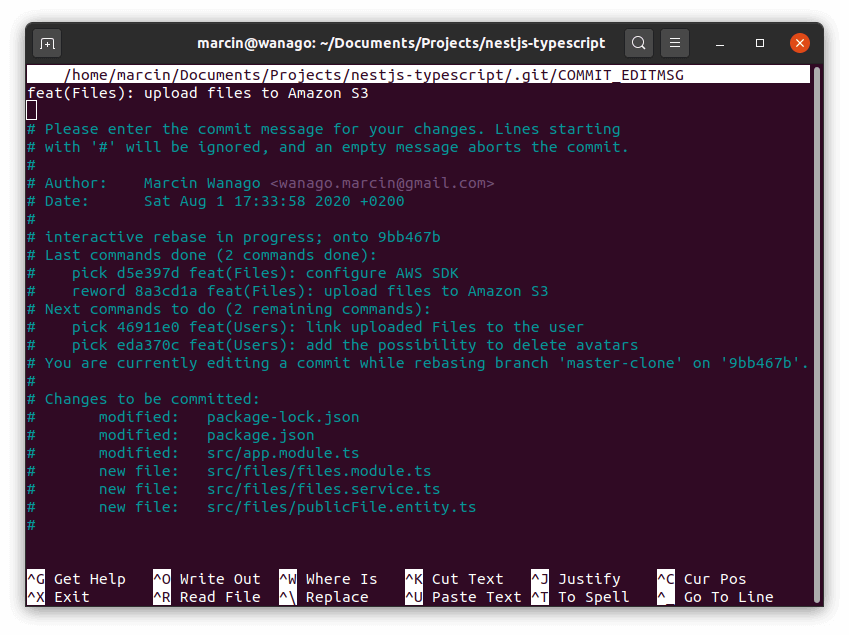 Above, you can see that Git opened the
.git/COMMIT_EDITMSG file in an editor called nano. You can change it to any text editor that fits your needs. To use Visual Studio Code instead, for example, run this:
Above, you can see that Git opened the
.git/COMMIT_EDITMSG file in an editor called nano. You can change it to any text editor that fits your needs. To use Visual Studio Code instead, for example, run this:
|
1 |
git config --global core.editor "code --wait" |
The --wait command makes sure that Git will wait for the VSC window to be closed before continuing
Sometimes we would like to undo the rebase that we’ve just performed. The most straightforward way to do so is to run git reset --hard origin/[branch-name]. By doing so, we reset our local branch to the state that is on our remote branch.
Editing a commit
Editing the contents of an already pushed commit might sometimes be necessary. Imagine committing the .env file containing some sensitive data that we don’t want to be in our Git history.
|
1 |
edit d5e397d feat(Files): configure AWS SDK |
Stopped at 8e7b938… feat(Files): configure AWS SDK
You can amend the commit now, withgit commit –amend
Once you are satisfied with your changes, run
git rebase –continue
Now we can modify the commit in a way we see fit.
|
1 2 3 |
git rm --cached ./.env echo ".env" >> .gitignore git add ./.gitignore |
With git rm --cached the file does not disappear from our drive
Once we modified all that we need, we can amend our commit.
|
1 2 |
git commit --amend git rebase --continue |
All that’s left is to push our changes with the --force-with-lease flag.
|
1 |
git push --force-with-lease origin [branch-name] |
In the previous part of this series we’ve learned that the above flag is a safer option that refuses to update the branch if somebody updated the remote branch.
Squashing commits
It is a good practice to commit our work frequently. It allows us to revert in a straightforward way and avoid the loss of our progress if something goes wrong.
We might want our commit history to be more straightforward, though. This is why we might want to squash our commits before merging our work.
|
1 2 3 4 |
pick d5e397d feat(Files): configure AWS SDK pick 535fa30 feat(Files): upload files to Amazon S3 pick b54aa70 feat(Users): link uploaded Files to the user squash a1d4bc6 feat(Users): add the possibility to delete avatars |
The above begins the process of squashing. To finish it up we need to provide a single commit message for all of the work we want to squash.
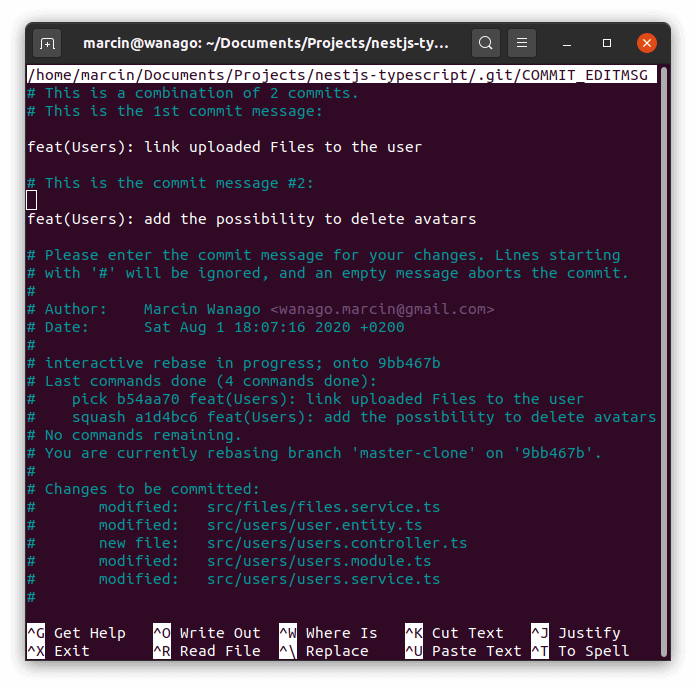
Instead of multiple commit messages, we need to come up with a single one.
Summary
Rebasing is quite a powerful tool that lets us clean up our mess. With it, we can maintain a clean project history and correct our mistakes. While you might not feel the need to use it every day, it might come in handy in some cases. It is a good idea to be aware of what we can do with it.
