
- 1. API with NestJS #1. Controllers, routing and the module structure
- 2. API with NestJS #2. Setting up a PostgreSQL database with TypeORM
- 3. API with NestJS #3. Authenticating users with bcrypt, Passport, JWT, and cookies
- 4. API with NestJS #4. Error handling and data validation
- 5. API with NestJS #5. Serializing the response with interceptors
- 6. API with NestJS #6. Looking into dependency injection and modules
- 7. API with NestJS #7. Creating relationships with Postgres and TypeORM
- 8. API with NestJS #8. Writing unit tests
- 9. API with NestJS #9. Testing services and controllers with integration tests
- 10. API with NestJS #10. Uploading public files to Amazon S3
- 11. API with NestJS #11. Managing private files with Amazon S3
- 12. API with NestJS #12. Introduction to Elasticsearch
- 13. API with NestJS #13. Implementing refresh tokens using JWT
- 14. API with NestJS #14. Improving performance of our Postgres database with indexes
- 15. API with NestJS #15. Defining transactions with PostgreSQL and TypeORM
- 16. API with NestJS #16. Using the array data type with PostgreSQL and TypeORM
- 17. API with NestJS #17. Offset and keyset pagination with PostgreSQL and TypeORM
- 18. API with NestJS #18. Exploring the idea of microservices
- 19. API with NestJS #19. Using RabbitMQ to communicate with microservices
- 20. API with NestJS #20. Communicating with microservices using the gRPC framework
- 21. API with NestJS #21. An introduction to CQRS
- 22. API with NestJS #22. Storing JSON with PostgreSQL and TypeORM
- 23. API with NestJS #23. Implementing in-memory cache to increase the performance
- 24. API with NestJS #24. Cache with Redis. Running the app in a Node.js cluster
- 25. API with NestJS #25. Sending scheduled emails with cron and Nodemailer
- 26. API with NestJS #26. Real-time chat with WebSockets
- 27. API with NestJS #27. Introduction to GraphQL. Queries, mutations, and authentication
- 28. API with NestJS #28. Dealing in the N + 1 problem in GraphQL
- 29. API with NestJS #29. Real-time updates with GraphQL subscriptions
- 30. API with NestJS #30. Scalar types in GraphQL
- 31. API with NestJS #31. Two-factor authentication
- 32. API with NestJS #32. Introduction to Prisma with PostgreSQL
- 33. API with NestJS #33. Managing PostgreSQL relationships with Prisma
- 34. API with NestJS #34. Handling CPU-intensive tasks with queues
- 35. API with NestJS #35. Using server-side sessions instead of JSON Web Tokens
- 36. API with NestJS #36. Introduction to Stripe with React
- 37. API with NestJS #37. Using Stripe to save credit cards for future use
- 38. API with NestJS #38. Setting up recurring payments via subscriptions with Stripe
- 39. API with NestJS #39. Reacting to Stripe events with webhooks
- 40. API with NestJS #40. Confirming the email address
- 41. API with NestJS #41. Verifying phone numbers and sending SMS messages with Twilio
- 42. API with NestJS #42. Authenticating users with Google
- 43. API with NestJS #43. Introduction to MongoDB
- 44. API with NestJS #44. Implementing relationships with MongoDB
- 45. API with NestJS #45. Virtual properties with MongoDB and Mongoose
- 46. API with NestJS #46. Managing transactions with MongoDB and Mongoose
- 47. API with NestJS #47. Implementing pagination with MongoDB and Mongoose
- 48. API with NestJS #48. Definining indexes with MongoDB and Mongoose
- 49. API with NestJS #49. Updating with PUT and PATCH with MongoDB and Mongoose
- 50. API with NestJS #50. Introduction to logging with the built-in logger and TypeORM
- 51. API with NestJS #51. Health checks with Terminus and Datadog
- 52. API with NestJS #52. Generating documentation with Compodoc and JSDoc
- 53. API with NestJS #53. Implementing soft deletes with PostgreSQL and TypeORM
- 54. API with NestJS #54. Storing files inside a PostgreSQL database
- 55. API with NestJS #55. Uploading files to the server
- 56. API with NestJS #56. Authorization with roles and claims
- 57. API with NestJS #57. Composing classes with the mixin pattern
- 58. API with NestJS #58. Using ETag to implement cache and save bandwidth
- 59. API with NestJS #59. Introduction to a monorepo with Lerna and Yarn workspaces
- 60. API with NestJS #60. The OpenAPI specification and Swagger
- 61. API with NestJS #61. Dealing with circular dependencies
- 62. API with NestJS #62. Introduction to MikroORM with PostgreSQL
- 63. API with NestJS #63. Relationships with PostgreSQL and MikroORM
- 64. API with NestJS #64. Transactions with PostgreSQL and MikroORM
- 65. API with NestJS #65. Implementing soft deletes using MikroORM and filters
- 66. API with NestJS #66. Improving PostgreSQL performance with indexes using MikroORM
- 67. API with NestJS #67. Migrating to TypeORM 0.3
- 68. API with NestJS #68. Interacting with the application through REPL
- 69. API with NestJS #69. Database migrations with TypeORM
- 70. API with NestJS #70. Defining dynamic modules
- 71. API with NestJS #71. Introduction to feature flags
- 72. API with NestJS #72. Working with PostgreSQL using raw SQL queries
- 73. API with NestJS #73. One-to-one relationships with raw SQL queries
- 74. API with NestJS #74. Designing many-to-one relationships using raw SQL queries
- 75. API with NestJS #75. Many-to-many relationships using raw SQL queries
- 76. API with NestJS #76. Working with transactions using raw SQL queries
- 77. API with NestJS #77. Offset and keyset pagination with raw SQL queries
- 78. API with NestJS #78. Generating statistics using aggregate functions in raw SQL
- 79. API with NestJS #79. Implementing searching with pattern matching and raw SQL
- 80. API with NestJS #80. Updating entities with PUT and PATCH using raw SQL queries
- 81. API with NestJS #81. Soft deletes with raw SQL queries
- 82. API with NestJS #82. Introduction to indexes with raw SQL queries
- 83. API with NestJS #83. Text search with tsvector and raw SQL
- 84. API with NestJS #84. Implementing filtering using subqueries with raw SQL
- 85. API with NestJS #85. Defining constraints with raw SQL
- 86. API with NestJS #86. Logging with the built-in logger when using raw SQL
- 87. API with NestJS #87. Writing unit tests in a project with raw SQL
- 88. API with NestJS #88. Testing a project with raw SQL using integration tests
- 89. API with NestJS #89. Replacing Express with Fastify
- 90. API with NestJS #90. Using various types of SQL joins
- 91. API with NestJS #91. Dockerizing a NestJS API with Docker Compose
- 92. API with NestJS #92. Increasing the developer experience with Docker Compose
- 93. API with NestJS #93. Deploying a NestJS app with Amazon ECS and RDS
- 94. API with NestJS #94. Deploying multiple instances on AWS with a load balancer
- 95. API with NestJS #95. CI/CD with Amazon ECS and GitHub Actions
- 96. API with NestJS #96. Running unit tests with CI/CD and GitHub Actions
- 97. API with NestJS #97. Introduction to managing logs with Amazon CloudWatch
- 98. API with NestJS #98. Health checks with Terminus and Amazon ECS
- 99. API with NestJS #99. Scaling the number of application instances with Amazon ECS
- 100. API with NestJS #100. The HTTPS protocol with Route 53 and AWS Certificate Manager
- 101. API with NestJS #101. Managing sensitive data using the AWS Secrets Manager
- 102. API with NestJS #102. Writing unit tests with Prisma
- 103. API with NestJS #103. Integration tests with Prisma
- 104. API with NestJS #104. Writing transactions with Prisma
- 105. API with NestJS #105. Implementing soft deletes with Prisma and middleware
- 106. API with NestJS #106. Improving performance through indexes with Prisma
- 107. API with NestJS #107. Offset and keyset pagination with Prisma
- 108. API with NestJS #108. Date and time with Prisma and PostgreSQL
- 109. API with NestJS #109. Arrays with PostgreSQL and Prisma
- 110. API with NestJS #110. Managing JSON data with PostgreSQL and Prisma
- 111. API with NestJS #111. Constraints with PostgreSQL and Prisma
- 112. API with NestJS #112. Serializing the response with Prisma
- 113. API with NestJS #113. Logging with Prisma
- 114. API with NestJS #114. Modifying data using PUT and PATCH methods with Prisma
- 115. API with NestJS #115. Database migrations with Prisma
- 116. API with NestJS #116. REST API versioning
- 117. API with NestJS #117. CORS – Cross-Origin Resource Sharing
- 118. API with NestJS #118. Uploading and streaming videos
- 119. API with NestJS #119. Type-safe SQL queries with Kysely and PostgreSQL
- 120. API with NestJS #120. One-to-one relationships with the Kysely query builder
- 121. API with NestJS #121. Many-to-one relationships with PostgreSQL and Kysely
There is quite a bit more to Amazon S3 than storing public files. In this article, we look into how we can manage private files. To do so, we learn how to set up a proper private Amazon S3 bucket and how to upload and access files. We use streams and generate presigned URLs with an expiration time.
You can find the code from this series in this repository.
Setting up Amazon S3
The first thing to do is to create a new bucket.

This time, we intend to restrict access to the files we upload. Every time we want our users to be able to access a file, they will need to do it through our API.
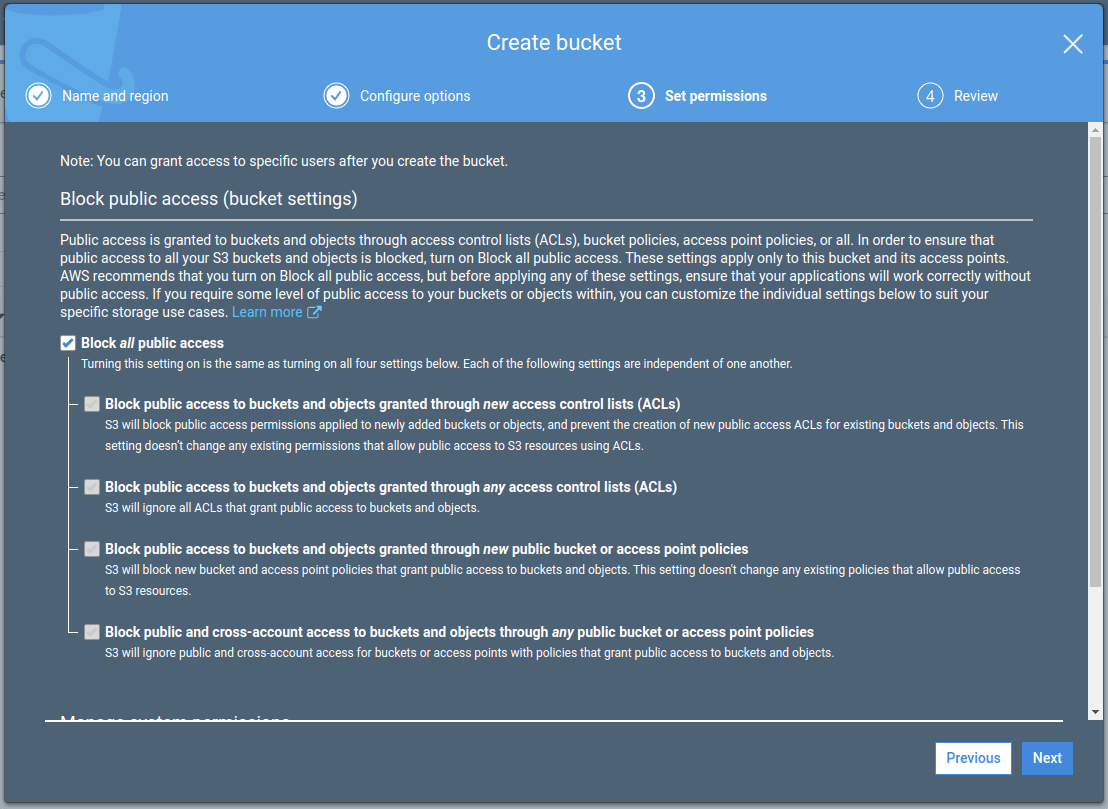
The IAM user that we’ve created in the previous part of this series has access to all our buckets. Therefore, all we need to do to start using it is to add the name of the bucket to our environment variables.
.env
|
1 2 |
# ... AWS_PRIVATE_BUCKET_NAME=nestjs-series-private-bucket |
/src/app.module.ts
An error has occurred. Please try again later. |
Managing files through the API
Once we have the above set up, we can start uploading files to our private bucket. When doing so, we want to save them in a similar way wheKolejny rok n dealing with public files. This time we won’t save the URL of the file, though.
Let’s allow our users to manage some files. To do that, let’s create the entity of a private file. It needs to contain the id of the user.
/src/privateFiles/privateFile.entity.ts
|
1 2 3 4 5 6 7 8 9 10 11 12 13 14 15 16 |
import { Column, Entity, ManyToOne, PrimaryGeneratedColumn } from 'typeorm'; import User from '../users/user.entity'; @Entity() class PrivateFile { @PrimaryGeneratedColumn() public id: number; @Column() public key: string; @ManyToOne(() => User, (owner: User) => owner.files) public owner: User; } export default PrivateFile; |
Now we need to add information about the other side of the relationship.
/src/users/user.entity.ts
|
1 2 3 4 5 6 7 8 9 10 11 12 13 14 15 |
import { Entity, OneToMany } from 'typeorm'; import PrivateFile from '../privateFIles/privateFile.entity'; @Entity() class User { // ... @OneToMany( () => PrivateFile, (file: PrivateFile) => file.owner ) public files: PrivateFile[]; } export default User; |
If you want to know more about defining relationships with Postgres and TypeORM, check out API with NestJS #7. Creating relationships with Postgres and TypeORM
We need to save the key so that we can access or delete our private files. Let’s create a separate service to manage them.
/src/files/privateFiles.service.ts
|
1 2 3 4 5 6 7 8 9 10 11 12 13 14 15 16 17 18 19 20 21 22 23 24 25 26 27 28 29 30 31 32 33 34 35 |
import { Injectable } from '@nestjs/common'; import { InjectRepository } from '@nestjs/typeorm'; import { Repository } from 'typeorm'; import { S3 } from 'aws-sdk'; import { ConfigService } from '@nestjs/config'; import { v4 as uuid } from 'uuid'; import PrivateFile from './privateFile.entity'; @Injectable() export class PrivateFilesService { constructor( @InjectRepository(PrivateFile) private privateFilesRepository: Repository<PrivateFile>, private readonly configService: ConfigService ) {} async uploadPrivateFile(dataBuffer: Buffer, ownerId: number, filename: string) { const s3 = new S3(); const uploadResult = await s3.upload({ Bucket: this.configService.get('AWS_PRIVATE_BUCKET_NAME'), Body: dataBuffer, Key: `${uuid()}-${filename}` }) .promise(); const newFile = this.privateFilesRepository.create({ key: uploadResult.Key, owner: { id: ownerId } }); await this.privateFilesRepository.save(newFile); return newFile; } } |
/src/files/privateFiles.module.ts
|
1 2 3 4 5 6 7 8 9 10 11 12 13 14 15 |
import { Module } from '@nestjs/common'; import { TypeOrmModule } from '@nestjs/typeorm'; import { PrivateFilesService } from './privateFiles.service'; import { ConfigModule } from '@nestjs/config'; import PrivateFile from './privateFile.entity'; @Module({ imports: [ TypeOrmModule.forFeature([PrivateFile]), ConfigModule, ], providers: [PrivateFilesService], exports: [PrivateFilesService] }) export class PrivateFilesModule {} |
Once that’s done, we can use all of the above to upload private files for our users.
/src/users/users.service.ts
|
1 2 3 4 5 6 7 8 9 10 11 12 13 14 15 16 17 18 19 20 |
import { Injectable } from '@nestjs/common'; import { InjectRepository } from '@nestjs/typeorm'; import { Repository } from 'typeorm'; import User from './user.entity'; import { PrivateFilesService } from '../privateFIles/privateFiles.service'; @Injectable() export class UsersService { constructor( @InjectRepository(User) private usersRepository: Repository<User>, private readonly privateFilesService: PrivateFilesService ) {} // ... async addPrivateFile(userId: number, imageBuffer: Buffer, filename: string) { return this.privateFilesService.uploadPrivateFile(imageBuffer, userId, filename); } } |
/src/users/users.controller.ts
|
1 2 3 4 5 6 7 8 9 10 11 12 13 14 15 16 17 18 19 20 21 22 |
import { UsersService } from './users.service'; import { Controller, Post, Req, UploadedFile, UseGuards, UseInterceptors } from '@nestjs/common'; import JwtAuthenticationGuard from '../authentication/jwt-authentication.guard'; import RequestWithUser from '../authentication/requestWithUser.interface'; import { FileInterceptor } from '@nestjs/platform-express'; import { Express } from 'express'; @Controller('users') export class UsersController { constructor( private readonly usersService: UsersService, ) {} // ... @Post('files') @UseGuards(JwtAuthenticationGuard) @UseInterceptors(FileInterceptor('file')) async addPrivateFile(@Req() request: RequestWithUser, @UploadedFile() file: Express.Multer.File) { return this.usersService.addPrivateFile(request.user.id, file.buffer, file.originalname); } } |
After doing all of the above, our users can start uploading private files.

You can also implement deleting the files in a very similar way as in the previous part of this series. It might be worth checking if the currently logged in user is an owner of the file, though.
Accessing private files
Since the files we upload above are private, we can’t access them by simply entering a URL. Trying to do so will result in getting an error.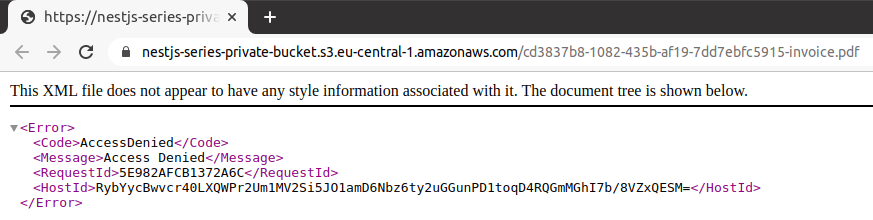
There is more than one way to approach this issue. Let’s start with the most straightforward one.
Fetching the file from Amazon S3 as a stream
The first solution to the above issue is to send the file through our API. The most fitting way to do that is to pipe a readable stream that we can get from the AWS SDK to our response. Thanks to working directly with streams, we don’t have to download the file into the memory in our server.
If you want to know more about piping streams in Node check out Node.js TypeScript #5. Writable streams, pipes, and the process streams
The first thing to do is to get a readable stream of data from our Amazon S3 bucket.
/src/privateFiles/privateFiles.service.ts
|
1 2 3 4 5 6 7 8 9 10 11 12 13 14 15 16 17 18 19 20 21 22 23 24 25 26 27 28 29 30 31 32 33 34 35 36 |
import { Injectable } from '@nestjs/common'; import { InjectRepository } from '@nestjs/typeorm'; import { Repository } from 'typeorm'; import { S3 } from 'aws-sdk'; import { ConfigService } from '@nestjs/config'; import PrivateFile from './privateFile.entity'; import { NotFoundException } from '@nestjs/common'; @Injectable() export class PrivateFilesService { constructor( @InjectRepository(PrivateFile) private privateFilesRepository: Repository<PrivateFile>, private readonly configService: ConfigService ) {} // ... public async getPrivateFile(fileId: number) { const s3 = new S3(); const fileInfo = await this.privateFilesRepository.findOne({ id: fileId }, { relations: ['owner'] }); if (fileInfo) { const stream = await s3.getObject({ Bucket: this.configService.get('AWS_PRIVATE_BUCKET_NAME'), Key: fileInfo.key }) .createReadStream(); return { stream, info: fileInfo, } } throw new NotFoundException(); } } |
Now we need to make sure if the users should be able to download the file.
/src/users/users.service.ts
|
1 2 3 4 5 6 7 8 9 10 11 12 13 14 15 16 17 18 19 20 21 22 23 24 25 26 |
import { Injectable, UnauthorizedException } from '@nestjs/common'; import { InjectRepository } from '@nestjs/typeorm'; import { Repository } from 'typeorm'; import User from './user.entity'; import { FilesService } from '../files/files.service'; import { PrivateFilesService } from '../privateFIles/privateFiles.service'; @Injectable() export class UsersService { constructor( @InjectRepository(User) private usersRepository: Repository<User>, private readonly filesService: FilesService, private readonly privateFilesService: PrivateFilesService ) {} // ... async getPrivateFile(userId: number, fileId: number) { const file = await this.privateFilesService.getPrivateFile(fileId); if (file.info.owner.id === userId) { return file; } throw new UnauthorizedException(); } } |
The interesting thing happens in the controller. Since we are working with streams directly, we need to access the Response object that NestJS uses under the hood.
/src/users/users.controller.ts
|
1 2 3 4 5 6 7 8 9 10 11 12 13 14 15 16 17 18 19 20 21 22 23 24 25 26 27 28 29 30 31 32 33 |
import { UsersService } from './users.service'; import { Controller, Get, Param, Req, Res, UseGuards, } from '@nestjs/common'; import JwtAuthenticationGuard from '../authentication/jwt-authentication.guard'; import RequestWithUser from '../authentication/requestWithUser.interface'; import { Response } from 'express'; import FindOneParams from '../utils/findOneParams'; @Controller('users') export class UsersController { constructor( private readonly usersService: UsersService, ) {} // ... @Get('files/:id') @UseGuards(JwtAuthenticationGuard) async getPrivateFile( @Req() request: RequestWithUser, @Param() { id }: FindOneParams, @Res() res: Response ) { const file = await this.usersService.getPrivateFile(request.user.id, Number(id)); file.stream.pipe(res) } } |
Above, we use the FindOneParams DTO for the purpose of validation. If you want to know more, check out API with NestJS #4. Error handling and data validation
Generating presigned URLs
Responding with the data of the file is not the only solution to provide our users with their files. Another way is generating presigned URLs that allow access for a specific expiration time.
We can generate URLs for different actions. To create one for getting a resource, we need to use the getObject operation name:
/src/files/privateFiles.service.ts
|
1 2 3 4 5 6 7 8 9 10 11 12 13 14 15 16 17 18 19 20 21 22 23 24 25 26 |
import { Injectable } from '@nestjs/common'; import { InjectRepository } from '@nestjs/typeorm'; import { Repository } from 'typeorm'; import { S3 } from 'aws-sdk'; import { ConfigService } from '@nestjs/config'; import PrivateFile from './privateFile.entity'; @Injectable() export class PrivateFilesService { constructor( @InjectRepository(PrivateFile) private privateFilesRepository: Repository<PrivateFile>, private readonly configService: ConfigService ) {} // ... public async generatePresignedUrl(key: string) { const s3 = new S3(); return s3.getSignedUrlPromise('getObject', { Bucket: this.configService.get('AWS_PRIVATE_BUCKET_NAME'), Key: key }) } } |
The default expiration time of a presigned URL is 15 minutes. We could change it by adding an Expires parameter.
Let’s provide the user with an array of all of the uploaded files.
/src/users/users.service.ts
|
1 2 3 4 5 6 7 8 9 10 11 12 13 14 15 16 17 18 19 20 21 22 23 24 25 26 27 28 29 30 31 32 33 34 35 36 37 |
import { Injectable, NotFoundException } from '@nestjs/common'; import { InjectRepository } from '@nestjs/typeorm'; import { Repository } from 'typeorm'; import User from './user.entity'; import { FilesService } from '../files/files.service'; import { PrivateFilesService } from '../privateFIles/privateFiles.service'; @Injectable() export class UsersService { constructor( @InjectRepository(User) private usersRepository: Repository<User>, private readonly filesService: FilesService, private readonly privateFilesService: PrivateFilesService ) {} // ... async getAllPrivateFiles(userId: number) { const userWithFiles = await this.usersRepository.findOne( { id: userId }, { relations: ['files'] } ); if (userWithFiles) { return Promise.all( userWithFiles.files.map(async (file) => { const url = await this.privateFilesService.generatePresignedUrl(file.key); return { ...file, url } }) ) } throw new NotFoundException('User with this id does not exist'); } } |
/src/users/users.controller.ts
|
1 2 3 4 5 6 7 8 9 10 11 12 13 14 15 16 17 18 19 20 21 22 23 24 |
import { UsersService } from './users.service'; import { Controller, Get, Req, UseGuards, } from '@nestjs/common'; import JwtAuthenticationGuard from '../authentication/jwt-authentication.guard'; import RequestWithUser from '../authentication/requestWithUser.interface'; @Controller('users') export class UsersController { constructor( private readonly usersService: UsersService, ) {} // ... @Get('files') @UseGuards(JwtAuthenticationGuard) async getAllPrivateFiles(@Req() request: RequestWithUser) { return this.usersService.getAllPrivateFiles(request.user.id); } } |
Now, the user can access all of the files in a very straightforward way.

Summary
In this article, we’ve broadened our knowledge about Amazon S3. This time, we’ve learned how to manage private files. It included fetching them with the use of streams and generating presigned URLs. All of the above knowledge covers a variety of cases. Therefore, it allows us to manage files with Amazon S3 properly.

Is there a way to change the downloaded file name with this presigned url? I am looking for a solution for the frontend where I can serve the files with their file type. Right now the link only downloads a file without any extension or filename.
I found out that to download files with their file types. You’ll need to define the ContentType and ContentDisposition attributes when uploading to the bucket.
You should add region for S3 object init otherwise you might get an error like that
“The authorization mechanism you have provided is not supported.”
import { S3Client } from “@aws-sdk/client-s3”;
// Set the AWS Region.
const REGION = “REGION”; //e.g. “us-east-1”
// Create an Amazon S3 service client object.
const s3Client = new S3Client({ region: REGION });
export { s3Client };
That happened to me because my aws-region was:
AWS Region
EU (Frankfurt) eu-central-1
read more here:
https://docs.aws.amazon.com/sdk-for-javascript/v3/developer-guide/getting-started-nodejs.html
Anyone have an idea on a secure implementation of video blocking with nestjs, if there is a sample on github that would be better