
- 1. API with NestJS #1. Controllers, routing and the module structure
- 2. API with NestJS #2. Setting up a PostgreSQL database with TypeORM
- 3. API with NestJS #3. Authenticating users with bcrypt, Passport, JWT, and cookies
- 4. API with NestJS #4. Error handling and data validation
- 5. API with NestJS #5. Serializing the response with interceptors
- 6. API with NestJS #6. Looking into dependency injection and modules
- 7. API with NestJS #7. Creating relationships with Postgres and TypeORM
- 8. API with NestJS #8. Writing unit tests
- 9. API with NestJS #9. Testing services and controllers with integration tests
- 10. API with NestJS #10. Uploading public files to Amazon S3
- 11. API with NestJS #11. Managing private files with Amazon S3
- 12. API with NestJS #12. Introduction to Elasticsearch
- 13. API with NestJS #13. Implementing refresh tokens using JWT
- 14. API with NestJS #14. Improving performance of our Postgres database with indexes
- 15. API with NestJS #15. Defining transactions with PostgreSQL and TypeORM
- 16. API with NestJS #16. Using the array data type with PostgreSQL and TypeORM
- 17. API with NestJS #17. Offset and keyset pagination with PostgreSQL and TypeORM
- 18. API with NestJS #18. Exploring the idea of microservices
- 19. API with NestJS #19. Using RabbitMQ to communicate with microservices
- 20. API with NestJS #20. Communicating with microservices using the gRPC framework
- 21. API with NestJS #21. An introduction to CQRS
- 22. API with NestJS #22. Storing JSON with PostgreSQL and TypeORM
- 23. API with NestJS #23. Implementing in-memory cache to increase the performance
- 24. API with NestJS #24. Cache with Redis. Running the app in a Node.js cluster
- 25. API with NestJS #25. Sending scheduled emails with cron and Nodemailer
- 26. API with NestJS #26. Real-time chat with WebSockets
- 27. API with NestJS #27. Introduction to GraphQL. Queries, mutations, and authentication
- 28. API with NestJS #28. Dealing in the N + 1 problem in GraphQL
- 29. API with NestJS #29. Real-time updates with GraphQL subscriptions
- 30. API with NestJS #30. Scalar types in GraphQL
- 31. API with NestJS #31. Two-factor authentication
- 32. API with NestJS #32. Introduction to Prisma with PostgreSQL
- 33. API with NestJS #33. Managing PostgreSQL relationships with Prisma
- 34. API with NestJS #34. Handling CPU-intensive tasks with queues
- 35. API with NestJS #35. Using server-side sessions instead of JSON Web Tokens
- 36. API with NestJS #36. Introduction to Stripe with React
- 37. API with NestJS #37. Using Stripe to save credit cards for future use
- 38. API with NestJS #38. Setting up recurring payments via subscriptions with Stripe
- 39. API with NestJS #39. Reacting to Stripe events with webhooks
- 40. API with NestJS #40. Confirming the email address
- 41. API with NestJS #41. Verifying phone numbers and sending SMS messages with Twilio
- 42. API with NestJS #42. Authenticating users with Google
- 43. API with NestJS #43. Introduction to MongoDB
- 44. API with NestJS #44. Implementing relationships with MongoDB
- 45. API with NestJS #45. Virtual properties with MongoDB and Mongoose
- 46. API with NestJS #46. Managing transactions with MongoDB and Mongoose
- 47. API with NestJS #47. Implementing pagination with MongoDB and Mongoose
- 48. API with NestJS #48. Definining indexes with MongoDB and Mongoose
- 49. API with NestJS #49. Updating with PUT and PATCH with MongoDB and Mongoose
- 50. API with NestJS #50. Introduction to logging with the built-in logger and TypeORM
- 51. API with NestJS #51. Health checks with Terminus and Datadog
- 52. API with NestJS #52. Generating documentation with Compodoc and JSDoc
- 53. API with NestJS #53. Implementing soft deletes with PostgreSQL and TypeORM
- 54. API with NestJS #54. Storing files inside a PostgreSQL database
- 55. API with NestJS #55. Uploading files to the server
- 56. API with NestJS #56. Authorization with roles and claims
- 57. API with NestJS #57. Composing classes with the mixin pattern
- 58. API with NestJS #58. Using ETag to implement cache and save bandwidth
- 59. API with NestJS #59. Introduction to a monorepo with Lerna and Yarn workspaces
- 60. API with NestJS #60. The OpenAPI specification and Swagger
- 61. API with NestJS #61. Dealing with circular dependencies
- 62. API with NestJS #62. Introduction to MikroORM with PostgreSQL
- 63. API with NestJS #63. Relationships with PostgreSQL and MikroORM
- 64. API with NestJS #64. Transactions with PostgreSQL and MikroORM
- 65. API with NestJS #65. Implementing soft deletes using MikroORM and filters
- 66. API with NestJS #66. Improving PostgreSQL performance with indexes using MikroORM
- 67. API with NestJS #67. Migrating to TypeORM 0.3
- 68. API with NestJS #68. Interacting with the application through REPL
- 69. API with NestJS #69. Database migrations with TypeORM
- 70. API with NestJS #70. Defining dynamic modules
- 71. API with NestJS #71. Introduction to feature flags
- 72. API with NestJS #72. Working with PostgreSQL using raw SQL queries
- 73. API with NestJS #73. One-to-one relationships with raw SQL queries
- 74. API with NestJS #74. Designing many-to-one relationships using raw SQL queries
- 75. API with NestJS #75. Many-to-many relationships using raw SQL queries
- 76. API with NestJS #76. Working with transactions using raw SQL queries
- 77. API with NestJS #77. Offset and keyset pagination with raw SQL queries
- 78. API with NestJS #78. Generating statistics using aggregate functions in raw SQL
- 79. API with NestJS #79. Implementing searching with pattern matching and raw SQL
- 80. API with NestJS #80. Updating entities with PUT and PATCH using raw SQL queries
- 81. API with NestJS #81. Soft deletes with raw SQL queries
- 82. API with NestJS #82. Introduction to indexes with raw SQL queries
- 83. API with NestJS #83. Text search with tsvector and raw SQL
- 84. API with NestJS #84. Implementing filtering using subqueries with raw SQL
- 85. API with NestJS #85. Defining constraints with raw SQL
- 86. API with NestJS #86. Logging with the built-in logger when using raw SQL
- 87. API with NestJS #87. Writing unit tests in a project with raw SQL
- 88. API with NestJS #88. Testing a project with raw SQL using integration tests
- 89. API with NestJS #89. Replacing Express with Fastify
- 90. API with NestJS #90. Using various types of SQL joins
- 91. API with NestJS #91. Dockerizing a NestJS API with Docker Compose
- 92. API with NestJS #92. Increasing the developer experience with Docker Compose
- 93. API with NestJS #93. Deploying a NestJS app with Amazon ECS and RDS
- 94. API with NestJS #94. Deploying multiple instances on AWS with a load balancer
- 95. API with NestJS #95. CI/CD with Amazon ECS and GitHub Actions
- 96. API with NestJS #96. Running unit tests with CI/CD and GitHub Actions
- 97. API with NestJS #97. Introduction to managing logs with Amazon CloudWatch
- 98. API with NestJS #98. Health checks with Terminus and Amazon ECS
- 99. API with NestJS #99. Scaling the number of application instances with Amazon ECS
- 100. API with NestJS #100. The HTTPS protocol with Route 53 and AWS Certificate Manager
- 101. API with NestJS #101. Managing sensitive data using the AWS Secrets Manager
- 102. API with NestJS #102. Writing unit tests with Prisma
- 103. API with NestJS #103. Integration tests with Prisma
- 104. API with NestJS #104. Writing transactions with Prisma
- 105. API with NestJS #105. Implementing soft deletes with Prisma and middleware
- 106. API with NestJS #106. Improving performance through indexes with Prisma
- 107. API with NestJS #107. Offset and keyset pagination with Prisma
- 108. API with NestJS #108. Date and time with Prisma and PostgreSQL
- 109. API with NestJS #109. Arrays with PostgreSQL and Prisma
- 110. API with NestJS #110. Managing JSON data with PostgreSQL and Prisma
- 111. API with NestJS #111. Constraints with PostgreSQL and Prisma
- 112. API with NestJS #112. Serializing the response with Prisma
- 113. API with NestJS #113. Logging with Prisma
- 114. API with NestJS #114. Modifying data using PUT and PATCH methods with Prisma
- 115. API with NestJS #115. Database migrations with Prisma
- 116. API with NestJS #116. REST API versioning
- 117. API with NestJS #117. CORS – Cross-Origin Resource Sharing
- 118. API with NestJS #118. Uploading and streaming videos
- 119. API with NestJS #119. Type-safe SQL queries with Kysely and PostgreSQL
- 120. API with NestJS #120. One-to-one relationships with the Kysely query builder
- 121. API with NestJS #121. Many-to-one relationships with PostgreSQL and Kysely
NestJS shines when it comes to handling errors and validating data. A lot of that is thanks to using decorators. In this article, we go through features that NestJS provides us with, such as Exception filters and Validation pipes.
The code from this series results in this repository. It aims to be an extended version of the official Nest framework TypeScript starter.
Exception filters
Nest has an exception filter that takes care of handling the errors in our application. Whenever we don’t handle an exception ourselves, the exception filter does it for us. It processes the exception and sends it in the response in a user-friendly format.
The default exception filter is called BaseExceptionFilter. We can look into the source code of NestJS and inspect its behavior.
nest/packages/core/exceptions/base-exception-filter.ts
|
1 2 3 4 5 6 7 8 9 10 11 12 13 14 15 16 17 18 19 20 21 22 23 24 25 26 27 28 29 |
export class BaseExceptionFilter<T = any> implements ExceptionFilter<T> { // ... catch(exception: T, host: ArgumentsHost) { // ... if (!(exception instanceof HttpException)) { return this.handleUnknownError(exception, host, applicationRef); } const res = exception.getResponse(); const message = isObject(res) ? res : { statusCode: exception.getStatus(), message: res, }; // ... } public handleUnknownError( exception: T, host: ArgumentsHost, applicationRef: AbstractHttpAdapter | HttpServer, ) { const body = { statusCode: HttpStatus.INTERNAL_SERVER_ERROR, message: MESSAGES.UNKNOWN_EXCEPTION_MESSAGE, }; // ... } } |
Every time there is an error in our application, the catch method runs. There are a few essential things we can get from the above code.
HttpException
Nest expects us to use the HttpException class. If we don’t, it interprets the error as unintentional and responds with 500 Internal Server Error.
We’ve used HttpException quite a bit in the previous parts of this series:
|
1 |
throw new HttpException('Post not found', HttpStatus.NOT_FOUND); |
The constructor takes two required arguments: the response body, and the status code. For the latter, we can use the provided HttpStatus enum.
If we provide a string as the definition of the response, NestJS serialized it into an object containing two properties:
- statusCode: contains the HTTP code that we’ve chosen
- message: the description that we’ve provided

We can override the above behavior by providing an object as the first argument of the HttpException constructor.
We can often find ourselves throwing similar exceptions more than once. To avoid code duplication, we can create custom exceptions. To do so, we need to extend the HttpException class.
posts/exception/postNotFund.exception.ts
|
1 2 3 4 5 6 7 |
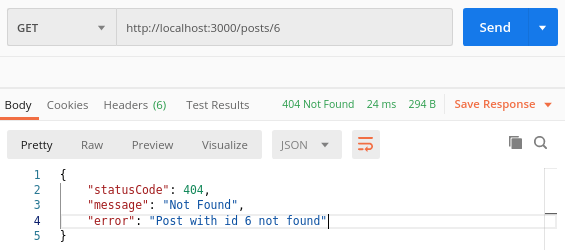
import { HttpException, HttpStatus } from '@nestjs/common'; class PostNotFoundException extends HttpException { constructor(postId: number) { super(`Post with id ${postId} not found`, HttpStatus.NOT_FOUND); } } |
Our custom PostNotFoundException calls the constructor of the HttpException. Therefore, we can clean up our code by not having to define the message every time we want to throw an error.
NestJS has a set of exceptions that extend the HttpException. One of them is NotFoundException. We can refactor the above code and use it.
We can find the full list of built-in HTTP exceptions in the documentation.
posts/exception/postNotFund.exception.ts
|
1 2 3 4 5 6 7 |
import { NotFoundException } from '@nestjs/common'; class PostNotFoundException extends NotFoundException { constructor(postId: number) { super(`Post with id ${postId} not found`); } } |
The first argument of the NotFoundException class is an additional error property. This way, our message is defined by NotFoundException and is based on the status.
Extending the BaseExceptionFilter
The default BaseExceptionFilter can handle most of the regular cases. However, we might want to modify it in some way. The easiest way to do so is to create a filter that extends it.
utils/exceptionsLogger.filter.ts
|
1 2 3 4 5 6 7 8 9 10 |
import { Catch, ArgumentsHost } from '@nestjs/common'; import { BaseExceptionFilter } from '@nestjs/core'; @Catch() export class ExceptionsLoggerFilter extends BaseExceptionFilter { catch(exception: unknown, host: ArgumentsHost) { console.log('Exception thrown', exception); super.catch(exception, host); } } |
The @Catch() decorator means that we want our filter to catch all exceptions. We can provide it with a single exception type or a list.
The ArgumentsHost hives us access to the execution context of the application. We explore it in the upcoming parts of this series.
We can use our new filter in three ways. The first one is to use it globally in all our routes through app.useGlobalFilters.
main.ts
|
1 2 3 4 5 6 7 8 9 10 11 12 13 14 15 |
import { HttpAdapterHost, NestFactory } from '@nestjs/core'; import { AppModule } from './app.module'; import * as cookieParser from 'cookie-parser'; import { ExceptionsLoggerFilter } from './utils/exceptionsLogger.filter'; async function bootstrap() { const app = await NestFactory.create(AppModule); const { httpAdapter } = app.get(HttpAdapterHost); app.useGlobalFilters(new ExceptionsLoggerFilter(httpAdapter)); app.use(cookieParser()); await app.listen(3000); } bootstrap(); |
A better way to inject our filter globally is to add it to our AppModule. Thanks to that, we could inject additional dependencies into our filter.
|
1 2 3 4 5 6 7 8 9 10 11 12 13 14 |
import { Module } from '@nestjs/common'; import { ExceptionsLoggerFilter } from './utils/exceptionsLogger.filter'; import { APP_FILTER } from '@nestjs/core'; @Module({ // ... providers: [ { provide: APP_FILTER, useClass: ExceptionsLoggerFilter, }, ], }) export class AppModule {} |
The third way to bind filters is to attach the @UseFilters decorator. We can provide it with a single filter, or a list of them.
|
1 2 3 4 5 |
@Get(':id') @UseFilters(ExceptionsLoggerFilter) getPostById(@Param('id') id: string) { return this.postsService.getPostById(Number(id)); } |
The above is not the best approach to logging exceptions. NestJS has a built-in Logger that we cover in the upcoming parts of this series.
Implementing the ExceptionFilter interface
If we need a fully customized behavior for errors, we can build our filter from scratch. It needs to implement the ExceptionFilter interface. Let’s look into an example:
|
1 2 3 4 5 6 7 8 9 10 11 12 13 14 15 16 17 18 19 20 21 |
import { ExceptionFilter, Catch, ArgumentsHost, NotFoundException } from '@nestjs/common'; import { Request, Response } from 'express'; @Catch(NotFoundException) export class HttpExceptionFilter implements ExceptionFilter { catch(exception: NotFoundException, host: ArgumentsHost) { const context = host.switchToHttp(); const response = context.getResponse<Response>(); const request = context.getRequest<Request>(); const status = exception.getStatus(); const message = exception.getMessage(); response .status(status) .json({ message, statusCode: status, time: new Date().toISOString(), }); } } |
There are a few notable things above. Since we use @Catch(NotFoundException), this filter runs only for NotFoundException.
The host.switchToHttp method returns the HttpArgumentsHost object with information about the HTTP context. We explore it a lot in the upcoming parts of this series when discussing the execution context.
Validation
We definitely should validate the upcoming data. In the TypeScript Express series, we use the class-validator library. NestJS also incorporates it.
NestJS comes with a set of built-in pipes. Pipes are usually used to either transform the input data or validate it. Today we only use the predefined pipes, but in the upcoming parts of this series, we might look into creating custom ones.
To start validating data, we need the ValidationPipe.
main.ts
|
1 2 3 4 5 6 7 8 9 10 11 12 |
import { NestFactory } from '@nestjs/core'; import { AppModule } from './app.module'; import * as cookieParser from 'cookie-parser'; import { ValidationPipe } from '@nestjs/common'; async function bootstrap() { const app = await NestFactory.create(AppModule); app.useGlobalPipes(new ValidationPipe()); app.use(cookieParser()); await app.listen(3000); } bootstrap(); |
In the first part of this series, we’ve created Data Transfer Objects. They define the format of the data sent in a request. They are a perfect place to attach validation.
|
1 |
npm install class-validator class-transformer |
For the ValidationPipe to work we also need the class-transformer library
auth/dto/register.dto.ts
|
1 2 3 4 5 6 7 8 9 10 11 12 13 14 15 16 17 |
import { IsEmail, IsString, IsNotEmpty, MinLength } from 'class-validator'; export class RegisterDto { @IsEmail() email: string; @IsString() @IsNotEmpty() name: string; @IsString() @IsNotEmpty() @MinLength(7) password: string; } export default RegisterDto; |
Thanks to the fact that we use the above RegisterDto with the @Body() decorator, the ValidationPipe now checks the data.
|
1 2 3 4 |
@Post('register') async register(@Body() registrationData: RegisterDto) { return this.authenticationService.register(registrationData); } |

There are a lot more decorators that we can use. For a full list, check out the class-validator documentation. You can also create custom validation decorators.
Validating params
We can also use the class-validator library to validate params.
utils/findOneParams.ts
|
1 2 3 4 5 6 |
import { IsNumberString } from 'class-validator'; class FindOneParams { @IsNumberString() id: string; } |
|
1 2 3 4 |
@Get(':id') getPostById(@Param() { id }: FindOneParams) { return this.postsService.getPostById(Number(id)); } |
Please note that we don’t use @Param('id') anymore here. Instead, we destructure the whole params object.
If you use MongoDB instead of Postgres, the @IsMongoId() decorator might prove to be useful for you here
Handling PATCH
In the TypeScript Express series, we discuss the difference between the PUT and PATCH methods. Summing it up, PUT replaces an entity, while PATCH applies a partial modification. When performing partial changes, we need to skip missing properties.
The most straightforward way to handle PATCH is to pass skipMissingProperties to our ValidationPipe.
|
1 |
app.useGlobalPipes(new ValidationPipe({ skipMissingProperties: true })) |
Unfortunately, this would skip missing properties in all of our DTOs. We don’t want to do that when posting data. Instead, we could add IsOptional to all properties when updating data.
|
1 2 3 4 5 6 7 8 9 10 11 12 13 14 15 16 17 |
import { IsString, IsNotEmpty, IsNumber, IsOptional } from 'class-validator'; export class UpdatePostDto { @IsNumber() @IsOptional() id: number; @IsString() @IsNotEmpty() @IsOptional() content: string; @IsString() @IsNotEmpty() @IsOptional() title: string; } |
Unfortunately, the above solution is not very clean. There are some solutions provided to override the default behavior of the ValidationPipe here.
In the upcoming parts of this series we look into how we can implement PUT instead of PATCH
Summary
In this article, we’ve looked into how error handling and validation works in NestJS. Thanks to looking into how the default BaseExceptionFilter works under the hood, we now know how to handle various exceptions properly. We know also know how to change the default behavior if there is such a need. We’ve also how to use the ValidationPipe and the class-validator library to validate incoming data.
There is still a lot to cover in the NestJS framework, so stay tuned!

Hi, l I want to thank you for this amazing blog. Haven’t had that much learning something new in a long time.
Hi, Thank you ffor this great tutorial, but I have a problem everytime i try to login i get the 401 unauthorized response. any help please?
You have to log in, using the API /authorization/log-in. But before that, you must also have an account registered using the API /authorization/register
Thank you very much about the article, but i have a question
How can i pass a list of classes error, currently it can only hande one error class because we use @Catch(NotFoundException)
Only ommit NotFoundException
@Catch()
Thanks for your quality articles.
I think you should talk about a very important attribute for the ValidationPipe:
whitelist.It is totally unintuitive that is default to false and very dangerous not to put it to true. It is possible to modify any element of the entity (for example, a createdAt)