- 1. React SSR with Next.js #1. Concept of Server Side Rendering & basics of routing
- 2. React SSR with Next.js #2. Prefetching the data with getInitialProps
In recent years, the popularity of client-side Single Page Applications skyrocketed, for various reasons. Following its principles, we build pages with the amount of interactivity that we didn’t have before. When using React to render the page the “regular” way, the server sends a blank page and the JavaScript files. By doing that, the browser can render the content on its own. The significant advantage of that is that we release our server from the above responsibility. That comes with some drawbacks too, because putting too much strain on the browser can worsen the experience of your users. Another reason that might make you worried is Search Engine Optimization (SEO). Google, in its docs, states that it’s difficult to process JavaScript and not all search engine crawlers are able to process it successfully or immediately.
Introduction to React Next.js Server-Side Rendering
While the above might improve in the future, we can take matters in our own hands and add the Server-Side Rendering (SSR). Applications like that are sometimes referred to as isomorphic because they render both on the server and the client side. To visualize the behavior that we want to change, we use Create React App.
|
1 2 |
npx create-react-app my-app npm start |
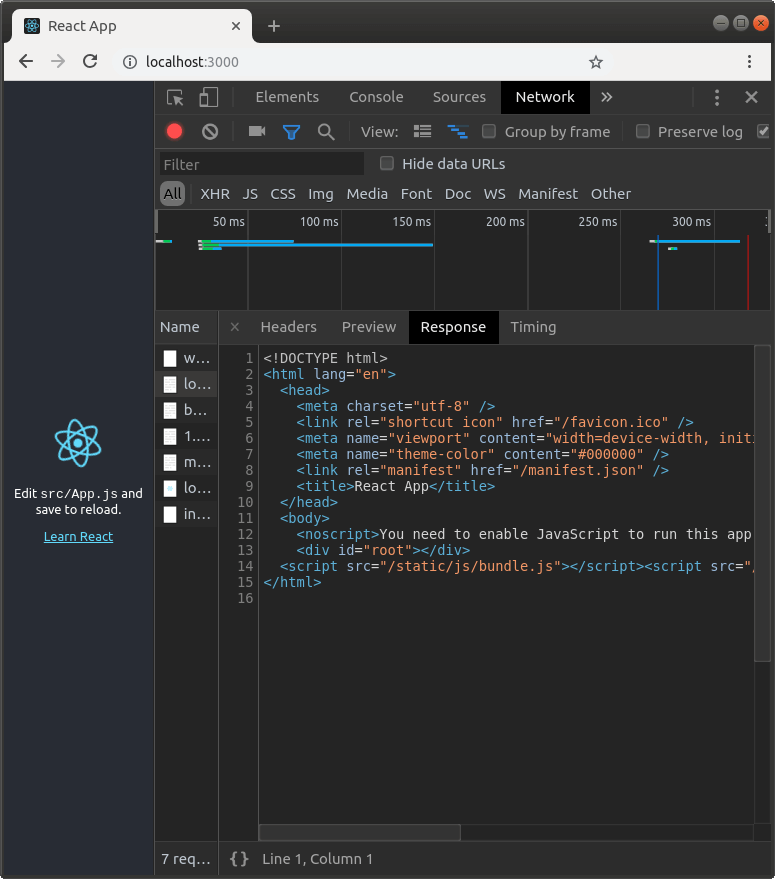
Let’s inspect the outcome in the browser.
We can see the fully rendered page. If we look into what the webpack-dev-server serves us, we can see that it is just a blank page with JavaScript.

Introducing Next.js
As you can see above, the browser does all the work of rendering the content. To change the above behavior, we can use the Next.js framework. By adding SSR, we change the initial response of the server so that the browser can display something right away.
|
1 |
npm install next react react-dom |
Please note that we don’t use Create React App here. Those are two seperate project and while probably we could make them work together, it is not working out of the box
The first concept to cover is the pages directory in the root of our project. Any file that you put there becomes a new entrypoint for our application. Let’s start with the first two components:
/pages/index.js
|
1 2 3 4 5 6 7 8 9 10 11 |
import React from 'react'; function Home() { return( <div> Home </div> ) } export default Home |
/pages/about.js
|
1 2 3 4 5 6 7 8 9 10 11 |
import React from 'react'; function About() { return ( <div> Hello world! </div> ) } export default About |
Add those scripts to your package.json:
|
1 2 3 4 5 |
"scripts": { "dev": "next", "build": "next build", "start": "next start" } |
and run npm run dev. The above creates two pages for us: http://localhost:3000/ and http://localhost:3000/about,and it is the most basic routing that we can implement with Next.js.
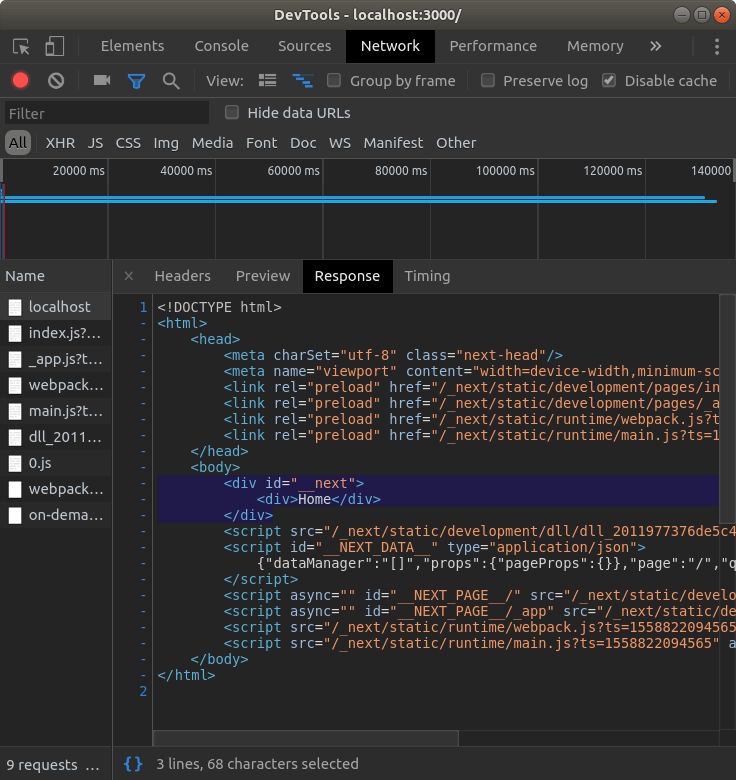
When we look into the DevTools, we can see that the components are already rendered when served for us.

What about interactive content?
In a typical React application, we can see something like that:
|
1 |
ReactDOM.render(<App />, document.getElementById('root')); |
With the ReactDOM.render, we render a React element into the DOM in the supplied container. But in our situation the div that we want to use to render our application isn’t empty: it has a pre-rendered view. Let’s try something interactive:
/pages/index.js
|
1 2 3 4 5 6 7 8 9 10 11 12 13 14 15 16 17 18 19 20 21 22 23 24 25 26 27 28 |
import React, { Component } from 'react'; class Counter extends Component { state = { count: 0 }; increase = () => { this.setState({ count: this.state.count + 1 }); }; decrease = () => { this.setState({ count: this.state.count - 1 }); }; render() { return ( <div> { this.state.count } <button onClick={this.increase}>+</button> <button onClick={this.decrease}>-</button> </div> ) } } export default Counter |
When you open the page prepared by Next.js you can observe that the above code works without issues.
First, the client receives the prerendered view. Then, the React attaches itself to it using a ReactDOM.hydrate function that is similar to ReactDOM.render, but it is suitable to use with the SSR content. Thanks to that, the user can interact with the page.
The basics of routing
The Next.js framework comes with its routing solution, and we use it instead of React Router. To create an anchor to another page, we use the Link component.
/pages/index.js
|
1 2 3 4 5 6 7 8 9 10 11 12 13 14 15 16 |
import React from 'react'; import Link from 'next/link' function Home() { return ( <div> Visit the {' '} <Link href="/about"> <a>/about</a> </Link> {' '} page </div> ) } export default Home |
All pages are lazy loaded. It means that once we click on the link, the new page is fetched and rendered in the browser. It also includes a proper code splitting, so that the user does not have to download code that unnecessary at the moment. An example of that is the fact that when we visit the main page, the code of the /about page is not yet loaded.
The above means that additional data is loaded when the user clicks on a link, what can cause the need for the extra content to load. Fortunately, Next.js gives us an easy way to prefetch the content of multiple pages.
|
1 2 3 |
<Link href="/about" prefetch> <a>/about</a> </Link> |
If we use the prefetch prop in production, Next.js adds the <link rel="preload"> tag to make sure that the JavaScript that additional pages need is fetched before the user needs it.
Since Next.js 8, it can even detect 2G internet and disable the prefetch on slower network connections
Using the router programmatically
Aside from using the Link component, we can also change routes manually using the Router.
|
1 2 3 4 5 6 7 8 9 10 11 12 13 14 15 16 17 18 |
import React from 'react'; import Router from 'next/router'; function Home() { return ( <div> Visit the {' '} <span onClick={() => Router.push('/about')} > /about </span> {' '} page </div> ) } export default Home |
As you might have already noticed, it is quite similar to the React Router. You might wonder what about prefetching – it can be achieved with the prefetch function of the router. The only issue with it is that you need to watch out not to use it on the server side of your JavaScript code. To ensure that, we can use the withRouter Higher Order Component and call prefetch in the componentDidMount lifecycle method.
|
1 2 3 4 5 6 7 8 9 10 11 12 13 14 15 16 17 18 19 20 21 22 23 24 25 |
import React, { Component } from 'react'; import { withRouter } from 'next/router'; class Home extends Component { componentDidMount() { const { router } = this.props; router.prefetch('/about'); } render() { const { router } = this.props; return ( <div> Visit the {' '} <span onClick={() => router.push('/about')} > /about </span> {' '} page </div> ) } } export default withRouter(Home); |
With the above code, the browser prefetches the /about page as soon as the Home component is mounted.
Our code runs in two different environments
One of the challenges when writing an application with Server Side Rendering is taking into account that our code runs in two different environments.
The first of them is the browser – when we interact with a page, the browser runs our JavaScript code.
The second is the Node.js on the server side. When the user makes an initial request, the server renders the view for him in the Node.js environment.
If you would like to know more about Node.js in general, check out my Node.js TypeScript series
Let me illustrate it for you:
/pages/index.js
|
1 2 3 4 5 6 7 8 9 10 11 12 13 14 15 16 |
import React from 'react'; import Link from 'next/link' function Home() { return ( <div> Visit the {' '} <Link href="/about"> <a>/about</a> </Link> {' '} page </div> ) } export default Home |
/pages/about.js
|
1 2 3 4 5 6 7 8 9 10 11 |
import React from 'react'; function About() { return ( <div> { window.location.href } </div> ) } export default About |
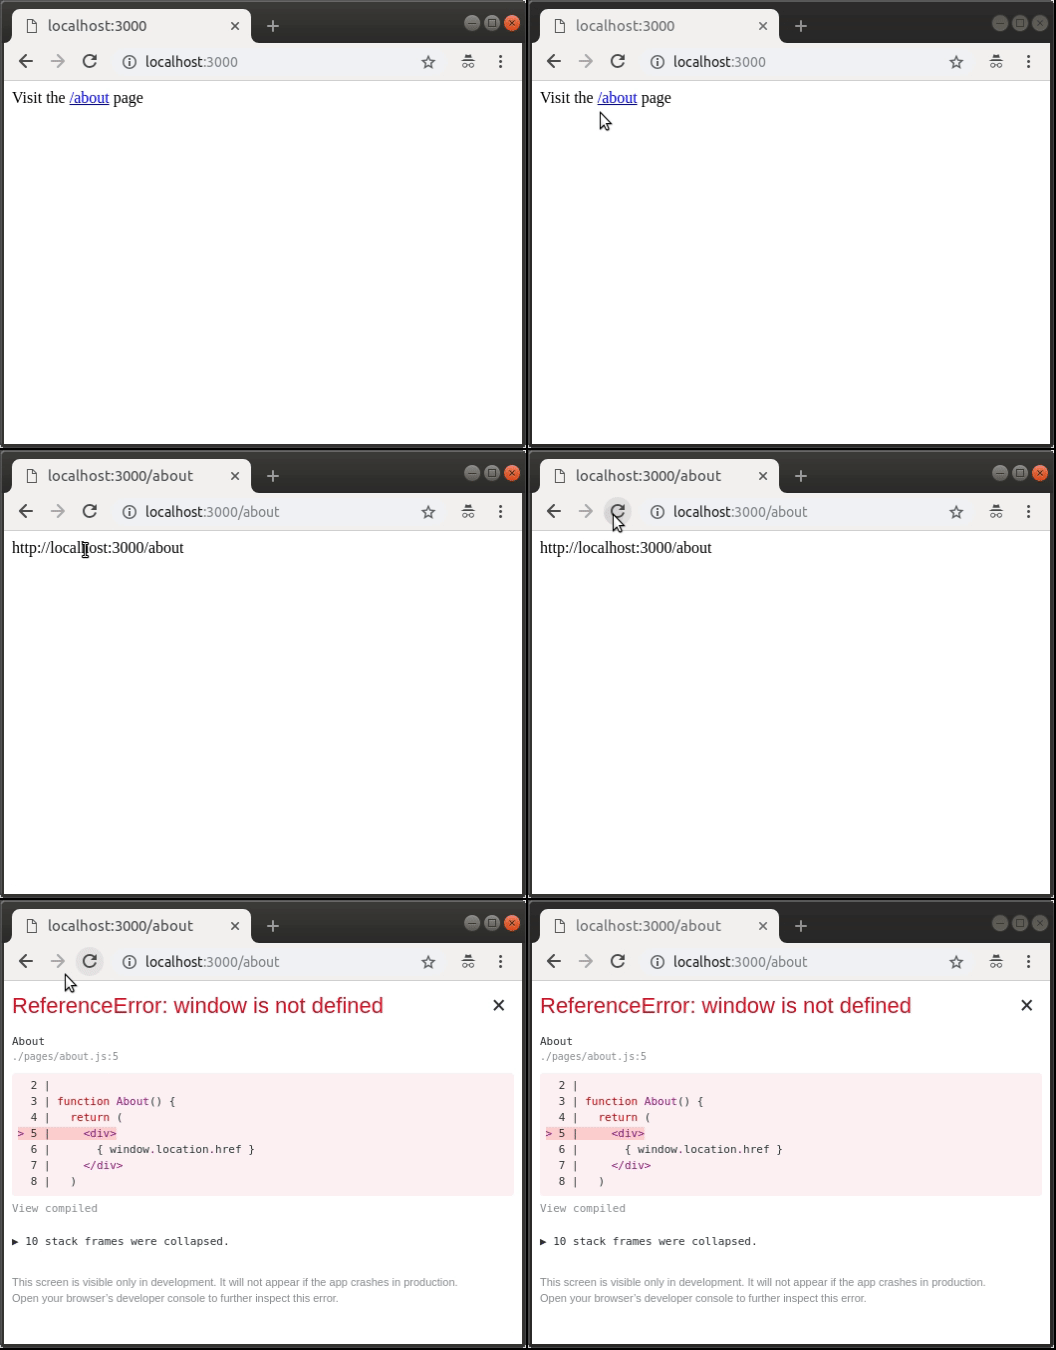
The first time we try to load the /about page, we do it by clicking on a link. By doing that, the JavaScript code of the /about page runs in the browser. The second time we load the /about page is by refreshing and since it is an initial page request, our JavaScript code runs in Node.js. Since there is no global window object there, we experience an error. Keep that in mind and watch out for such pitfalls.
Summary
Today we covered the very basics of React Next.js Server-Side Rendering. We learned about both the benefits and disadvantages of that solution. While doing that, we’ve covered the basic of how does the Next.js framework works. We’ve learned how to implement the routing and what to watch out for when starting to learn Next.js.

